Category Archives: Animated GIF

GIFing with Jean-Claude

JCVD-Sheep_ShootSlink

“Oh Sheep! This is gonna look bad.” – The directors cut.   (Created by Rochelle Lockridge  for the JCVD #GIFFight)

My latest round of creativity induced OCD started with a new GIFFight challenge from Michael B Smith (@mbransons)

There’s also a DS106 Animated GIF Assignment 1190 for any of the GIFFight projects to post to.

After downloading 1.1GB of short .mov clips of Jean-Claude Van Damme from Funny or Die JCVD Make My Movie Challenge there was no turning back.  I was riding the dopamine wave.  There were some new learnings and tricky bits with the Adobe Elements software I was using that I’ve included below in the process portion of this post.

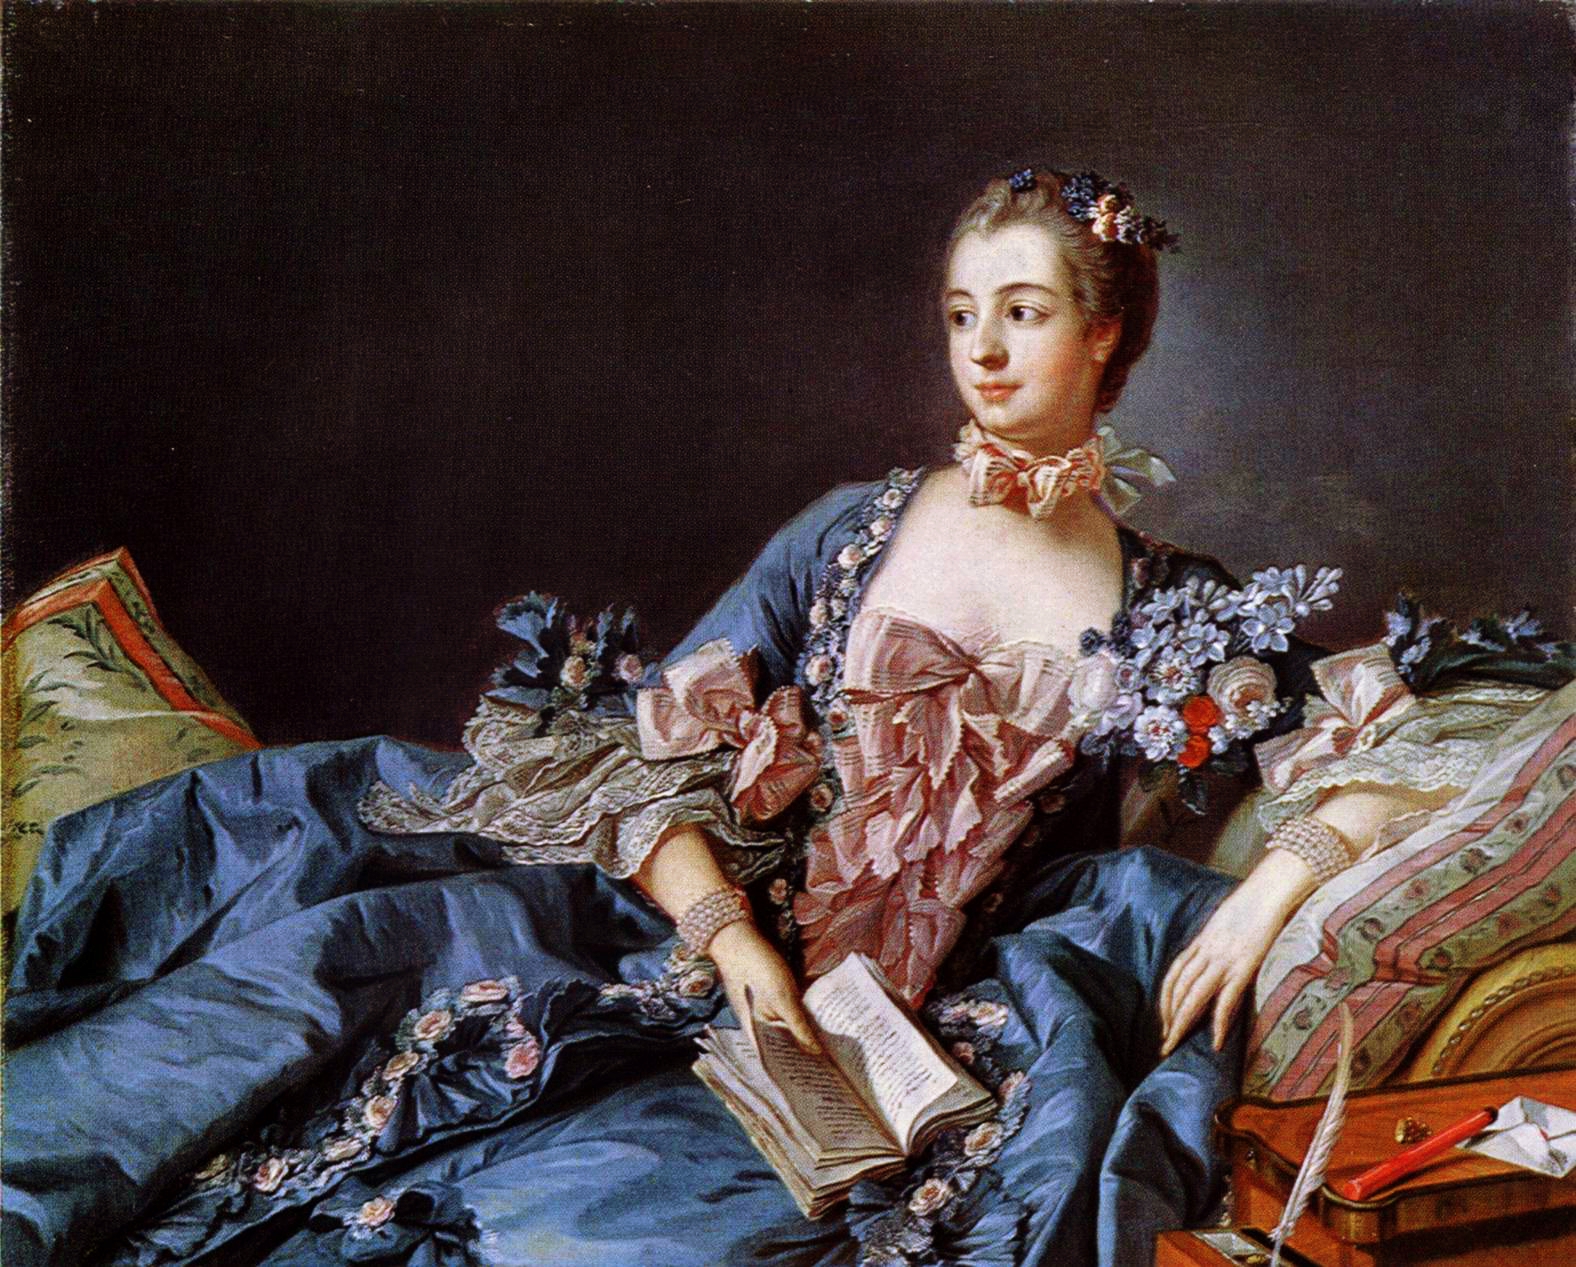
My first GIFs used downloaded images from the Tate Collectives which I had been introduced to through a previous GIFFight Challenge. Animate the crap out of 1840’s Tate Artworks as part of the Tate Museum 1840’s GIF Party. (There’s also a DS106 Animated GIF assignment 1248 for this too.)

Two of my Tate 1840’s GIF Party entries:


JCVD-Vesuvius

JCVD Erupts With Mt. Vesuvius

Vesuvius In Eruption from the Tate Collectives

JCVD-TatePastPresent

JCVD To The Rescue. “I’ll protect you.”

Past and Present No. 1 from the Tate Collectives

The continued ride on that dopamine wave resulted in me making the following JCVD gifs to give a few of my DS106 mates a giggle.

Wanting to celebrate John Johnston’s hitting 106 likes on his JJGifs Tumblr site I searched through his posts and found a GIF of sheep running past that I thought would work well. Due to Tumblr size restrictions I was forced to shorten the “directors cut” version you see at the top of this post.  I just thought having him shooting the place up then realizing it was just sheep passing by added another layer of absurdity. The shortened version below is still funny watching JCVD slink away with the sheep though.

JCVD-SheepSlink_Short

“Oh Sheep! This is gonna look bad.” Shorter version due to Tumblr size restrictions

Sheep GIF from JJGIFs

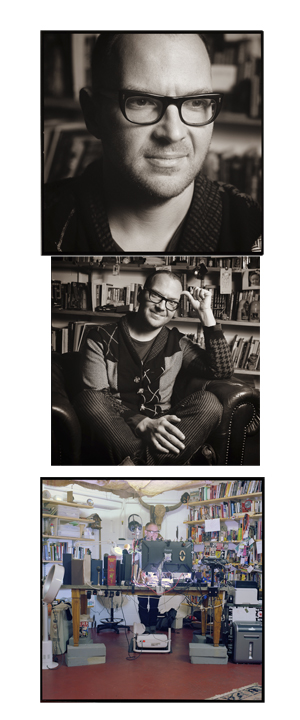
The GIFaChrome corporation recently posted that Colin’s new body guard, Jean-Claude Van Damme may need to tone down his enthusiasm somewhat.  He’s going to scare everybody off…. not just the bad guys.

JCVDRun_ColinToy

JCVD is the new bodyguard for Colin the Dog (@GIFaDog). The GIFaChrome mascot.

A crazed Jean-Claude Van Damme freaked out on Twitter. His overactive testosterone levels blinded him to the fact that DS106 doesn’t need protecting from @clhendricksbc.

JCVDRun_Christina

Jean-Claude freaks out over @clhendricksbc Twitter thumb.

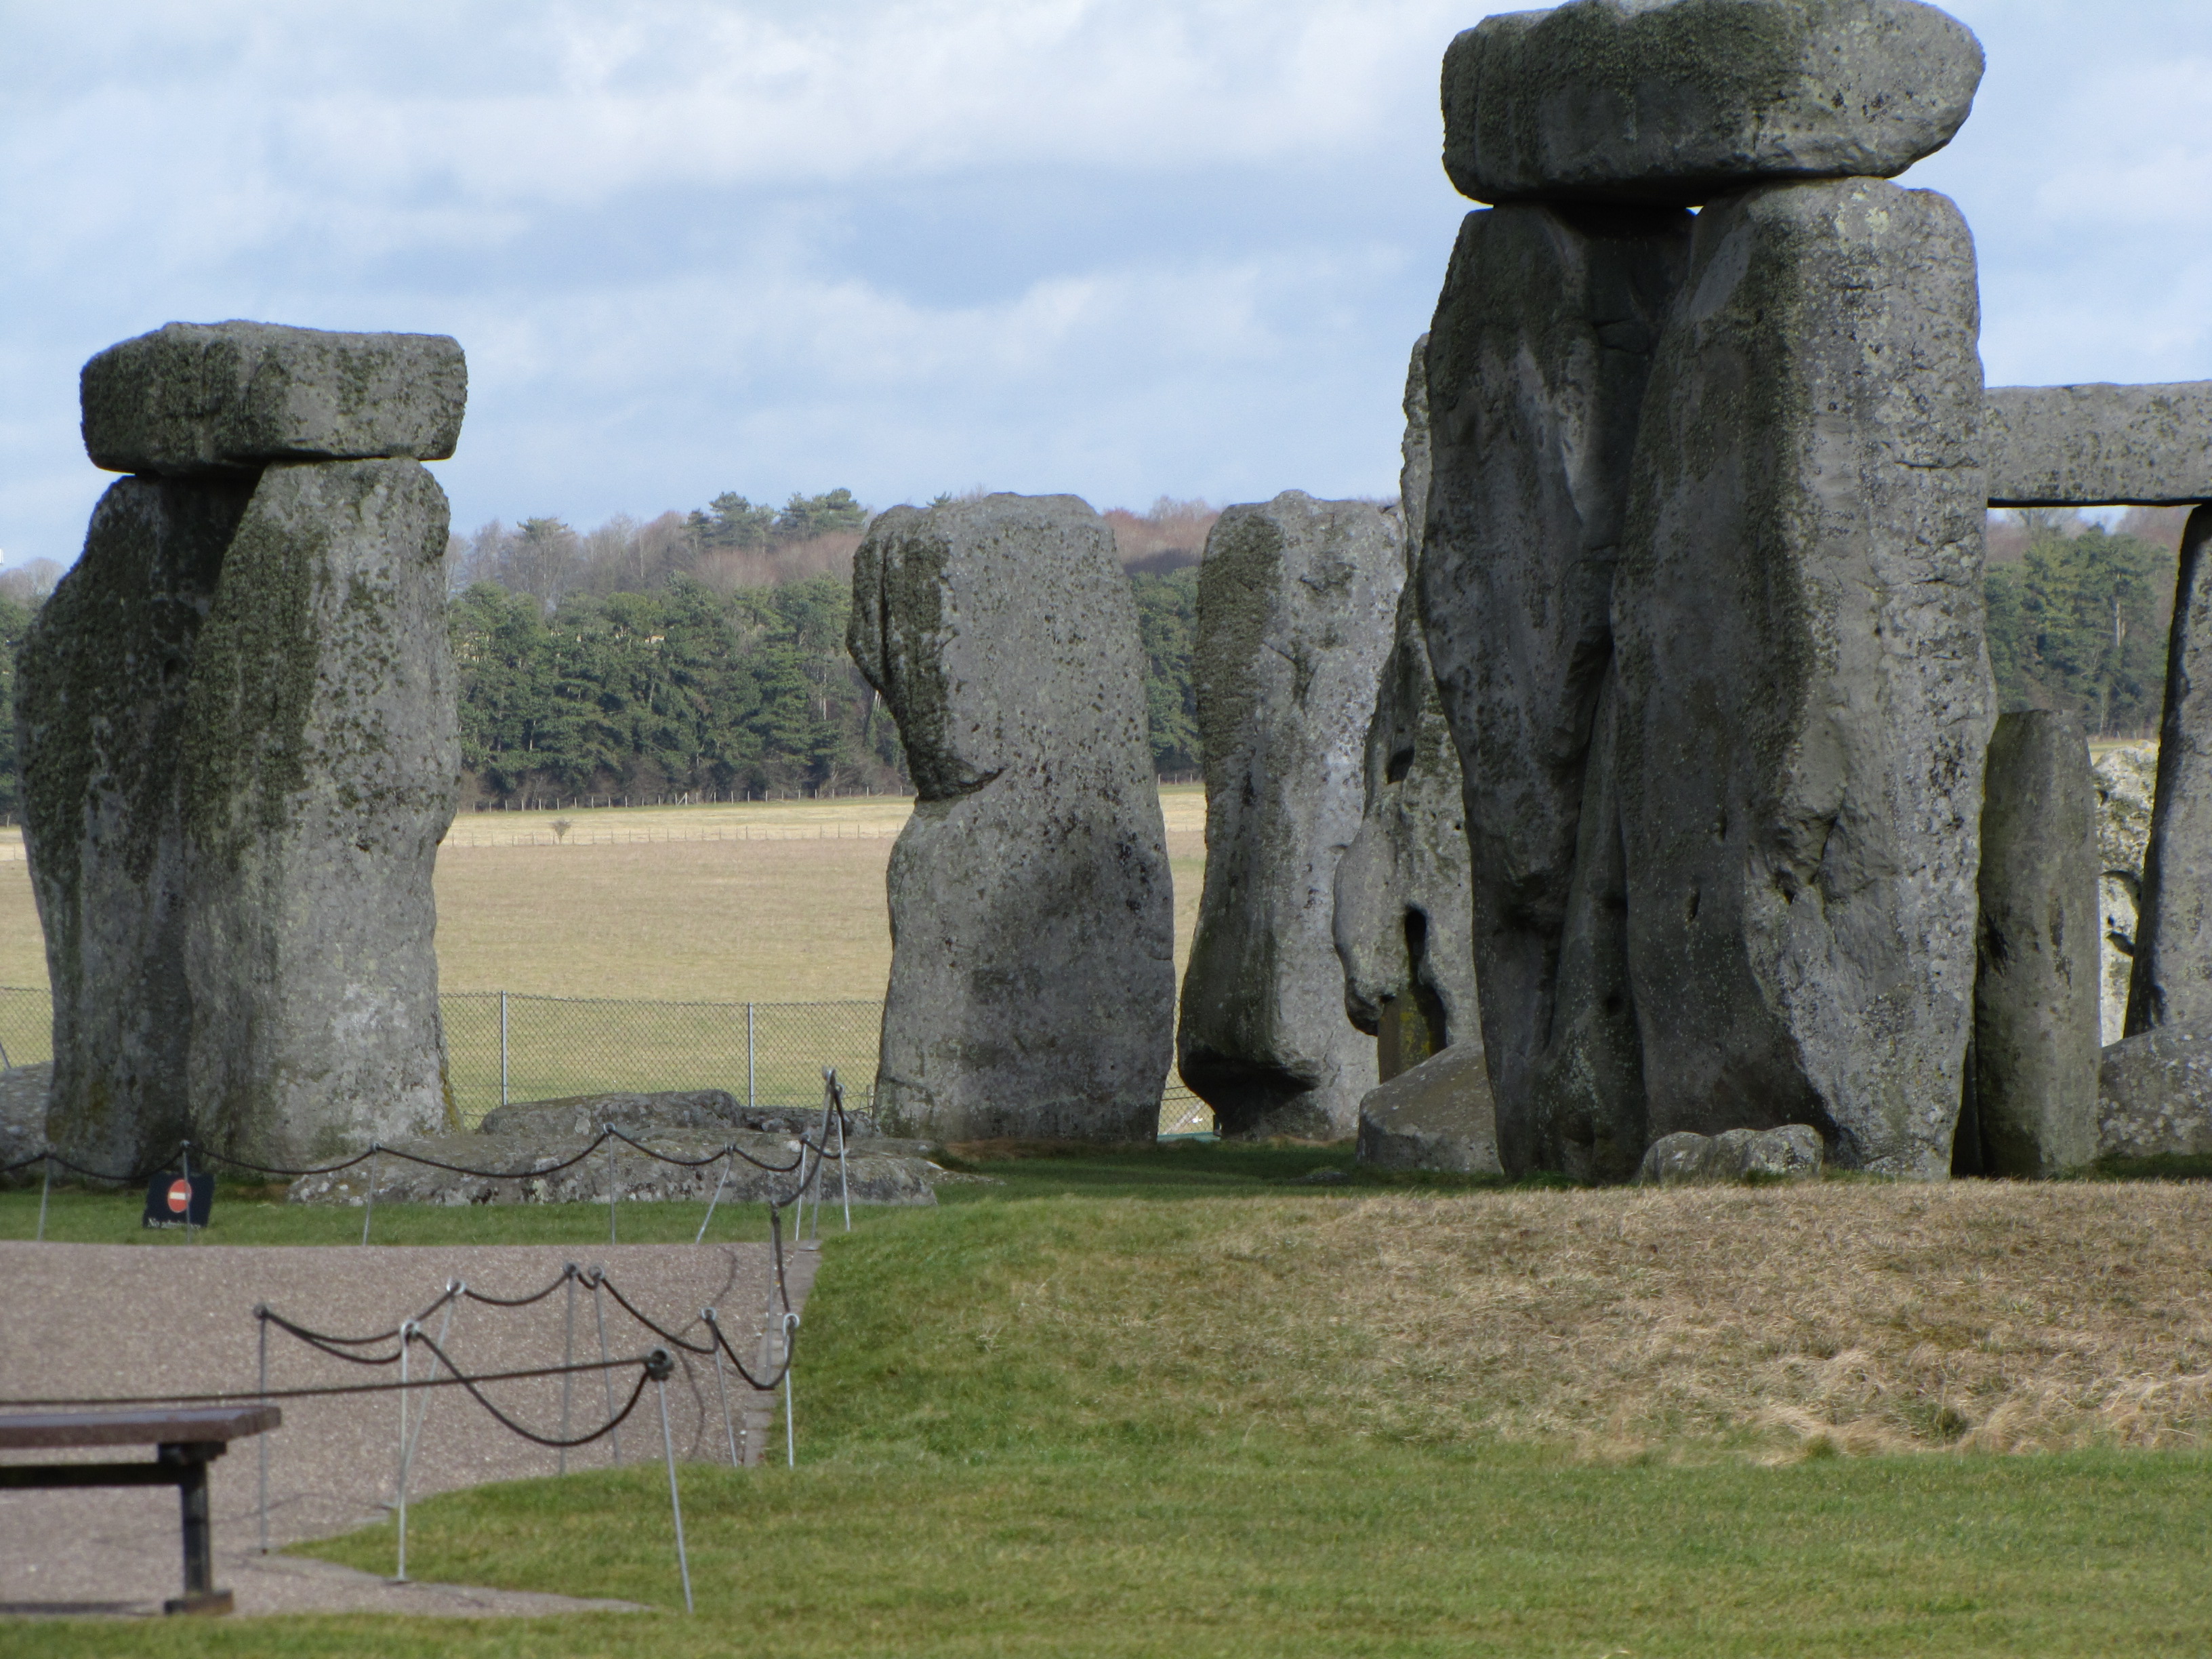
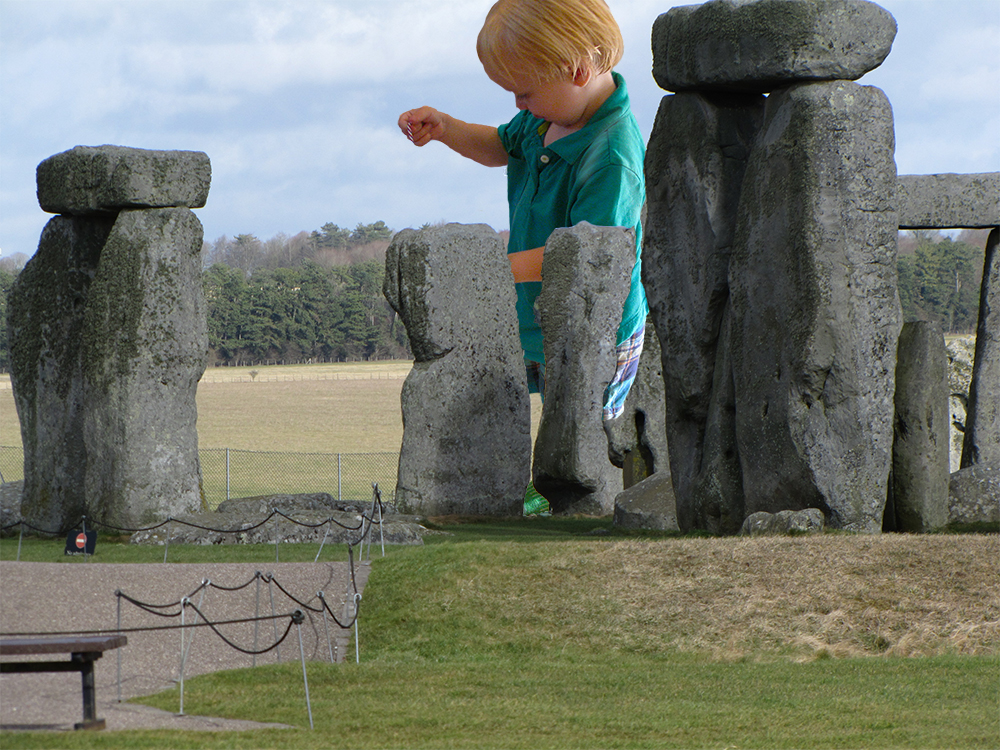
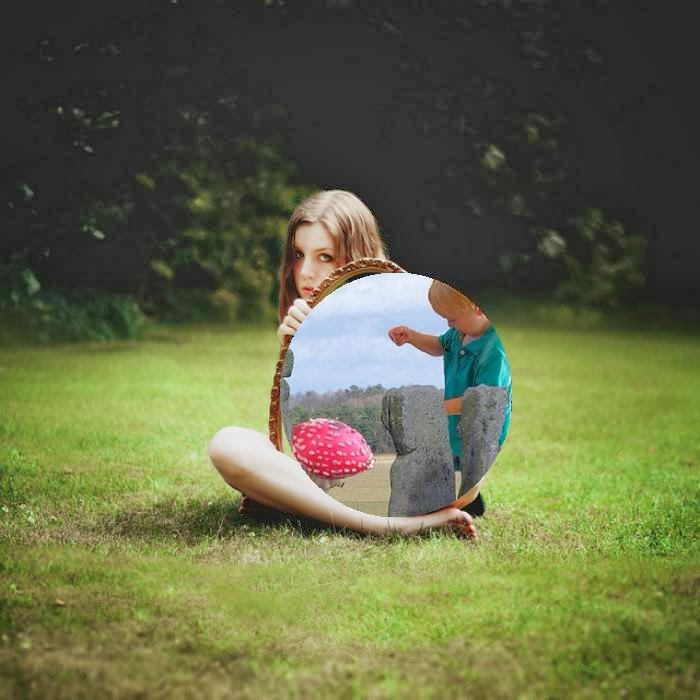
Remember the DS106 Headless ’13 Riff-a-GIF spontaneous collaboration Riffs Sprouting Up Overnight? Which started out as a doctored photo of my grandson “DJ at Stonehenge“, Glad Jean-Claude wasn’t in the picture back then “protecting us”.

JCVDRun_DJStonehenge

Stonehenge under attack – “Run for your lives! I’ll cover you!”

The How I Did It portion

I’m thinking it would be helpful if I were to create a screen cast tutorial for this process.  Like I said above, it’s a little tricky and has taken a fair bit of effort on my part to learn how to do it. Future project……

  1. Downloaded the 1.1GB (yes Gigabytes) of .mov clips from Funny or Die JCVD Make My Movie Challenge.
  2. Imported the clips into Adobe Premeire Elements 12 and added them to the time line.
  3. Added the still image onto a track under the JCVD clip. Premiere Elements knew that the movie clip was formatted so that it should have a transparent background and automatically created a video merge effect.
  4. Render, Publish+Share as Computer files => Scroll down to choose JPEG
  5. => Advanced => Basic Settings Click “Export as Sequence”
  6. To easily make the GIF in PSD from many images without having to drag and drop each. (A very painful process when you have 82 frames.)  The easy way…. File=>Place
  7. File => Save for web => make sure to check the “image sequence”.  Check for compliance with Tumblr size restrictions max 500px wide and must be less than 1MB

Going one step further, so that I or others (or me 🙂 ) could use the JCVD transparent images for their projects I produced a GIF and accompanying layered PSD file.

To create transparent background of JCVD for use in PSD files.

  1. Added JCVD movie clip to time line.
  2. This time our background will be a solid color that we can delete when it gets into Photoshop.
  3. Open project assests => New Item => Color Matte => pick color (I used green screen)
  4. Render, Publish+Share as Computer files => Scroll down to choose JPEG
  5. => Advanced => Basic Settings Click “Export as Sequence”
  6. Save
  7. Open jpg series in Photoshop Elements with File=>Place.
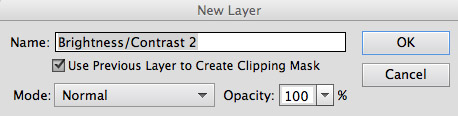
  8. click on layer changing it from background to layer
  9. Select a portion of the green. Select Similar. Select Inverse.
  10. Refine Edge. Output decontaminate Colors – amt 100% – Output to New Layer
  11. Smart Radius = 2.1 , Smooth = 1
  12. Edit => Cut (or ctrl-X)
  13. Delete original layers with the green background
  14. File => Save for web => make sure to check the “image sequence”.  Check for compliance with Tumblr size restrictions max 500px wide and must be less than 1MB.

JCVDRun_Template


DS106 Rocks!

DS106 ROCKS! 3M-DS106 Salon Patroness admiring the work of her co-collaborators for their OER14 paper.

If you’ve been following my communications out to the world over the last few days you know that the OER14 paper, “A DS106 Thing Happened on the Way to the 3M Tech Forum” that Alan Levine, Mariana Funes and I were writing was joyfully submitted on 2/27/14.  We’ll be presenting our 3M-DS106 Salon work at the end of April in Newcastle, UK. (Link to keynote speakers and panel members) For more see my post 3M+DS106+P2PL=OER14+M2M,  which includes a video I created from interviews with the 3M participants and the original abstract for the paper.


The Art used for making the “art”:

With my focus on writing the paper (and my paying job at 3M that is making all of this possible) I haven’t taken much space to create something just for fun.  As soon as the paper finished I jumped back into the “art” game and used the opportunity to show my appreciation for my ‘partners in crime’:  Alan Levine, Mariana Funes, and Giulia Forsythe. (Who at our hopeful request in the final week, does what she does best, doodled a wonderful image to capture the paper beautifully.)

OER14-GiuliaForsythe

“A DS106 Thing Happened on the Way to the 3M Tech Forum” illustrated by Giulia Forsythe (@GiuliaForsythe on Twitter)

As usual, ideas emerged and morphed as I was in creation mode.  The first image created was of the three of us enjoying our time in the Salon. It was sparked by an innocent comment from Mariana on the final draft of the paper and the resulting Twitter DM exchange.

MF: This is now icing on cake – but did you not have a wonderful photo of the Patroness in the days of yore in one of your posts? Could we add it here? And gif it? No. Kidding.”

RL: Thx for final comments. Especially reference comments at end. Are you truly serious about inserting the Salon GIF into our paper?

MF: I would love it. You think it is too much? It would be still for printing but could be a lead in to gif 4 work? or the 1 with work process? would be nice to have something stand out in the dull dull proceedings 🙂 it is a work thing for u so yr call!

There were many layers and tools used in re-making the paintings.  All were produced in Adobe Photoshop CS5.  The more advanced transformation tools available over Photoshop Elements allowed me to do things like warp the little red 3M on the envelope on the side table and Giulia’s doodle seen in the lap of the Salon Patroness, Madame de 3M106 .

I was fortunate to already have Colin the Dog (seen at our feet), and our three heads cut out from previous projects. The biggest issue that took A LOT of time futzing around was matching the color and texture of the new heads to the rest of the painting.  With these two projects I’ve (rather painfully) moved beyond the novice stage of applying layer mask effects. It’s easy once you get it – sort of like making a GIF. But up to this point it was more of an accident than a purposeful action.  See that little check box (Which pops up when you are creating a new layer.) next to “Use Previous Layer to Create Clipping Mask”? We are now best friends.

LayerMaskWindos

Not yet totally familiar with all of the layer effects and filters, I just kept trying stuff out until it looked sort of like I wanted.  I’m not 100% satisfied with the results, but it’s a long way from when I first started. (Nana-Tina-Little Alan REDOI still need more practice.  Look closely and you’ll also find DS106 on the back of the couch on the left side of the portrait and an OER14 on the right side of the mantle. 

But I really like the efffect of the rocking DS106.  This was one of those instances of serediptity.  I wanted to turn the still image into a GIF.  Nothing in the new image stood out as a piece that could be GIFed without what looked to me a lot of work.  I decided to try making the DS106 flash.  Again, playing around with the layer style effects I ended up with some modified images that would give the original flashing illusion I was intending. But stepping back and taking another look, I noticed something I wasn’t expecting. It turned out that creating the animation frames by turning off and on the layer effects of drop shadow, satin and emboss, it gave the DS106 the illusion of rocking in 3D behind my head. I love it when these things happen.

Mariana explains this well in an early draft of our OER14 paper.  (We had to reduce the word count from 6,000 down to 3,500. A lot of good stuff was left on the cutting room floor.)

Default open cultures generate the environment needed for innovation and creative thought. Zweig (2011) suggests that generating an environment that enables ‘structured serendipity’  may help us be more creative. From a cognitive perspective, Funes (2003) research suggests creative thought has at its core ‘bridging’ activity; creativity happens at the point of discontinuity when bridging from one domain to another. DS106 teaches bridging through an environment of structured serendipity via its focus on what Rheingold (2014) describes as ‘product orientation’ but is referred to in the DS106 open community as ‘Just make art, damn it!’

Credits for DS106 ROCKS!

Original painting: ‘Madame de Pompadour’ by François Boucher

Wall Painting Riff:

I cut out the center section of this original painting by Jean François de Troy (Paris 1679 – Rome 1752), “Reading from Molière” around 1728 found on Salon (gathering) Wikipage

Jean François de Troy (Paris 1679 – Rome 1752), “Reading from Molière”

I use a riff of this painting as the 3M-DS106 thumbnail image.

DS106 walkers small

Side Note:

I was formatting references for the paper for 6+ hours all told.  I’m going to get as much mileage out of that tediously boring work as I can.


Headless ’13 – The End

DJ-Headless-V1Without an instructor how would we know when to stop? When would we see “The End”?  Thanks to Mariana Funes for realizing that the UMW Fall semester ended on Friday, December 13th, 2013, the DS106 Headless ’13 course was given an end date. #DS106 is #4Life, but the Fall 2013 DS106 “headless” experience came to as close to an official close as a headless course can on 12/13/13.

The final project specs asked Headless ’13 DS106 participants to produce a story around a character that explores at least three of the media forms we’ve investigated this semester: visual/design, audio, video, web, remix/mashup, with the idea of creating a narrative arc for a character that is played out in the products of ds106 Assignments, and woven together with context and writing as a standalone blog post.

GAC-Poster

As per the DS106 culture (The ‘DS’ stands for Digital Subversives, right?), we went rogue and our final project turned out to be a collaborative creation of a GIFaChrome Camera which included a website, blog posts , “employee” profiles that included links to DS106 projects they created during the semester, prototype images, and a live product launch on DS106 Radio. For me it provided an opportunity to showcase the work done by all of us. Mariana captured what she could in her Storify Collection.  And this whirlwind adventure culminated my own intense 6 month learning curve in digital storytelling on the web. In less than two weeks my part in our final project had me practicing and honing my skills with everything I’d learned – and then some. Fortunately, I had a week’s vacation that I needed to use or lose.  I used it!

A few examples:

I’ve been trying to finish and post my wrap-up comments for the course for over two months now, without success.  If it ever gets done it’s entitled ‘GIFaChrome – A DS106 Practicum’.  This “abstract” of that post is really being written so that I can publish my fun little animated GIF at the top of this post, DS106 Headless ’13 – The End.

Making the GIF:

Using Photoshop CS5 I used the selection tool to copy and cut out the DS106 foam letters, which were individually placed into seperate layers.  I then used the clone, band-aid, and blur tools to cover up the holes left behind and make the back one continuous layer.  The additional text, Headless ’13 and The End, used the Stencil font which I’ve found is pretty close to the font used on the DS106 site.  With the animation feature in the full version of Photoshop it was easy to add the letters and text without the need to merge layers.  This allowed me to play around with a couple of different scenarios before I settled on the version posted above.  The final touch was to add drop shadow layering effects to the letters and text.  Increasing the distance for the text lines made them stand out even more- giving the GIF a bit of a 3D look.

Ewww Brain… Now in 3D!

My DS106 maxim of Reduce, Riff & Recycle has once again resulted in a fun, creative morning project.  Ewww Brain… Now in 3D!

3DGIF_SharkBoy_Lines-fb

Last August,  DS106’s Talky Tina created daily GIF challenges to keep our creative juices flowing while we were waiting for the DS106 Headless ’13 course to begin.

Talky Tina’s DS106 animated GIF challenge August 2013 GIF Challenge #10: Monster Chiller Horror Theatre 3D Style GIF  was to:

…look for a part of a scene in a 3D type movie where the thing comes right out of the screen at you.  Find a way to emphasize the moving of the thing out of the screen and into your face in a GIF.

 Ewww…Brain! was my answer to the challenge taken from a  Sharkboy & Lava Girl- May The Best Dream Win movie clip on YouTube. (Link to original blog post for the ‘how it was made.’) Today while trolling my Twitter home stream a DS106 exchange about how to make a 3D GIF with the use of white lines caught my eye. (See twitter feed below.) The illusion reminded me of John Johnston’s GIFaChrome Layercake technology  that I hadn’t tried yet. I decided to give it a go andd watched the video tutorial recommended by Mariana Funes.

Using the original Photoshop CS5 file from the Talky Tina challenge I created one white (two seemed excessive) mask line.  I’ll be honest.  I’m not sure how I managed to create a layer mask instead of the intended solid white line demonstrated in the video tutorial.  But who’s going to complain? It made things much easier in the Studio B production department this morning.  Lucky me!

Next, all I had to do was erase the portion of the line where the brain was popping out of the screen. Hmmm…. What to do with the brain goo as the brain slides down the screen?  That presented a creative challenge all its own. It looked way cooler if I adjusted the erasing opacity to 50% instead of 100% to enhance the illusion of sliding down a glass surface.  One final visual feature was to use the lasso tool to cut out a brain and have it slide down over the black border of the movie trailer clip.

Looking forward to using this technique in the future.  Below is the Twitter conversation that sparked this project.

GIFAChrome Camera GIFs Cory Doctorow

Professional photographer Jonathan Worth has put out an invitation for anyone to take his photos of Cory Doctorow, activist for liberalizing copyright laws and proponent for Creative Commons, and remix them in anyway you like. They will then choose from the best remixes and share any profits with their co-creators.

A series of photographs taken by Jonathan Worth of author Cory Doctorow are now available for you to remix, regenerate, and to make new art, especially in light of the themes and topics of his books. Your challenge is to make something new out of the photos.

This is a new experiment in public art, and a new way of thinking about digital media. Who could be a better figure than an author who releases all of his published works under creative commons license with an open invitation to remix?

This opportunity was presented to the DS106 participants for Remix/Mashup weeks, as well as turned into an assignment MashupAssignments1020. The process of creating these new images evolved through three versions and resulted in the creation by Rockylou Productions and a host of other co-creators as documented by Mariana Funes of the first GIFAChrome Camera with accompanying GIFAChrome DS106 Film.

Cory_GIFStrip_4-3DWig_300px

Cory Doctorow GIFAChrome DS106 GIFStrip for Jonathan Worth post-photo remix invitation was co-created at Rockylou Productions.

And as part of the “rules” of the remix challenge, everything we create must be licensed under a creative commons license too. (Notice the CC license logo on the strip?) So no worry about patent infringement or licensing fees. Everyone is welcome to use this work and remix it for themselves. I’ve even included templates at the end of the post that you can download to make your own GIFAChrome image.

Another wonderful side of collaboration and co-creation is that you don’t have to do it all yourself. Others are there to support the evolution of the project at hand.  While I’m covering the process below, Mariana brilliantly captured the contributors and expanded on the philosophical issues that can arise.

=> Check out the Storify collection of tweets and commentary from co-inventor Mariana Funes:  “The Birth of an idea.”

This week I have been following and participating in DS106 Remix weeks. As usual, there have been unexpected surprises and reflections. I expected to learn the difference between a remix and a mashup, but never expected to change my mind about what it means to own an idea. – Mariana Funes


The Manufacturing Process of a GIFAChrome GIFStrip

After perusing the photos of Doctorow, and the remixes already submitted, my creativity kicked into high gear. I happily discovered  two versions of the Doctorow head shot that could be turned into a GIF. [Head shot 1  and Head shot 2] How about making one of my GIF strips? [DJ BIrthday Dance GIFStrip] Yep… I found two more images from Jonathan of Cory working at his computer that could work. [Working 1 and Working 2]. The third would be the shot of him sitting in his chair in front of the bookcase.

DRAFT 1:

Using Photoshop CS5, each GIF was made in its own Photoshop file.  Then the three image composites were combined into one larger canvas strip with one above the other as shown below.

Cory_GIFStrip_PicsDraft

Each GIF and/or image is stacked one atop the other to create an image strip.

I then placed a film strip template on top of everything.  DJ BIrthday Dance GIFStrip will walk you through the process. With the first draft finished, I alerted the DS106 community on Twitter and our DS106 Google+ Community, asking for feedback to improve the image. This was after all to be a collaborative project.

There were comments from several that the head shot image was a favorite. So I turned it into a single GIFAChrome image.


Cory_GIFAChrome_Head

Cory Doctorow GIFAChrome DS106 Image created from original images by Jonathan Worth

VERSION 2:

Adjusting the colored image:

I wasn’t happy with the final panel as colored, I learned how to use layer filters in Photoshop, thanks to a post by Alan Levine, and was able to apply hue/contrast and brightness adjustments to a single layer. I was pleased that it didn’t take me too long to approximate the color scheme of the first two panels.

Redesigning the film strip template:

Jonathan had joked about his disappointment with the rebate  He was evidently accustomed to 120 film. What the heck was he talking about?

I had to do a Wikipedia search to find out what a film “rebate” was (the stuff along the sides of the images that give the image number and film type) and that the film template I was using was for 35mm film. 120 film doesn’t have those little sprocket holes on the sides. [Learn more about the differences]  I certainly wasn’t expecting a lesson on photographic film types for this assignment. But you never know what rabbit hole the DS106 Matrix will take you down.

I went back to Worth’s photos and found a collage of contact sheets that I used as examples to build the new frame template. The font used on the Kodak strip turned out to be pretty close to Century Gothic. That was easy. Alan Levine joining in the Twitter banter, suggested a DS106 film would be appropriate.

I had toyed with many names for my new invention. RockylouChrome was definitely out. It was clunky. Finally the light bulb turned on and GIFAChrome DS106 film was born.The GIFAChrome DS106 100 film obviously had to have a camera to be used in. With version two of the GIFStrip a new-to-the-world GIFAChrome camera was invented.

I was also watching and listening to the viewers of these new images, and several were concerned with the middle frame not “GIFfing”, and wondered if there was something wrong with the strip.

Back to the photoshop for…

VERSION 3:

AlanLevine_GIFAChrome-3D-5

Alan Levine GIFAChrome DS106 3D Wigglegram

What to do…. What to do…. What I considered an artistic statement by keeping the middle frame still was confusing to others, So I put my artistic ego aside and turned the middle frame into a 3D Wigglegram GIF.  A technique I acquired this summer creating Rockin’ The Rocks in 3D. And with Alan Levine as my subject matter while completing this project.


I very carefully extracted Cory sitting in his comfy leather chair from the bookshelf background with the quick selection tool. I then had to use the clone tool and spot healing brush to rebuild some of the bookshelf and applied a blur filter to the entire background. This helps Cory’s image stand out even more. There were then three frames of Doctorow, each off-set slightly- roducing the GIFAChrome single image below.

Cory-GIFAChromeDS106-Chair-3DWiggle

Cory Doctorow GIFAChrome DS106 3D Wigglegram

The 3D wigglegram GIF looks better if it “wiggles” faster than the other GIFs I was using.  To create this effect I made 12 animation frames for the entire GIF sequence at 0.06 seconds in duration.  The top and bottom frames remained stationary for 6 frames each (a total of 0.24 sec) while the center frame rapidly oscillated at the 0.06 frame rate.

Cory Doctorow GIFAChrome DS106 GIF Strip- DOWNLOAD at  100ppi GIF  or  300ppi GIF

We were requested to save our files in the high resolution of the original images. At 3000ppi this resulted in a final Photoshop file of a whopping 1.4GB. Ouch! That’s huge. It’s amazing that my computer didn’t crash- just slowed down during processing. I was able to finally reduce the file size to “only” 670MB by deleting and merging some unnecessary layer.s  If you’re interested you can download the whole thing here. All were created in Photoshop CS5.

TEMPLATES:

GIFAChrome Templates are in the .png format so you can easily insert your own GIF images within a transparent center frame.

GIFAChrome-StripTemplate_100px

GIFAChrome DS106 GIFStrip template DOWNLOAD

GIFAChrome-Single_100px

GIFAChrome DS106 Single Frame Template DOWNLOAD

Riffs Sprouting Up Overnight

GAKC-AliceDJ-Mush-CCat-Smoke-Colin-CatPil_Rabbit


UPDATE 12/06/13: Check it out we were featured on the GIFaChrome Connects blog.

Another fun aspect of DS106 being an open online course that attracts global participation is that you can go to bed at night (usually way past a healthy bedtime because you just “had” to finish one more thing on that project) and wake up in the morning to find a comment on your posted work, or better yet that someone(s) have delightfully riffed on your creation. DS106 Never Sleeps! Such was the case with my DJ at Stonehenge photo I originally created for ds106 daily create tdc669.

From Wikipedia: A flash mob (or flashmob)[1] is a group of people who assemble suddenly in a public place, perform an unusual and seemingly pointless act for a brief time, then quickly disperse, often for the purposes of entertainment, satire, and artistic expression.[2][3][4] Flash mobs are organized via telecommunicationssocial media, or viral emails.[5][6][7][8][9]

Here’s what the ds106 flash mob created between 11/11/13 to 12/06/13:

  1. A giant DJ is spotted at Stonehenge.
  2. Mushrooms sprout up overnight.
  3. It’s all a dream reflected in Alice’s looking glass as shown by Cathleen Nardi.
  4. It gets curiouser and curiouser when a patch of spinning mushrooms and the  Cheshire Cat show up.
  5. Over night another patch of mushrooms spring up and smoke is seen gently rising from within.
  6. Colin dog is spotted lurking in the trees holding his stick ready for play.
  7. Alan Levine’s radioactive caterpillar notices the smoke rising among the mushrooms and crawls on back to see if his buddy is hanging out there.
  8. Cathleen Nardi notices a rabbit hole appearing in a flash in the bottom left corner with a pair of ears just poking out.
  9. Rochelle Lockridge coaxes the little white rabbit out of his hole.
  10. The story is captured with the new GIFaKidChrome imager in development over at the GIFaChrome labs.

You can witness the evolution of the composite image right here as it unfolds. I plan on updating this blog entry if it morphs further.  And links are provided to the posts so you can follow the comments and story line as it develops.  (Suggestion: By subscribing to comments on this post you can get the latest updates directly.)

Note: All of the image GIFs and layered .psd files are attached below so anyone can join in the fun. Most current Photoshop file can be downloaded here

Original Photos and evolution of our ds106 flashmob collaboration:

StoneHenge

Photo 1: Stonehenge – Feb 2010 photo taken by Rockylou

25. Pull Train

Photo 2: DJ opening toy train for his 2nd birthday (Aug 2013)

Nov 9, 2013 @7:57pm Minnesota, USA or 9:37am Hawaii or Nov 10 @12:37am Scotland

Photo 1 + Photo 2 + Rockylou’s sense of humor+ Photoshop CS5 => DJ at Stonehenge for ds106 daily create tdc669: “Take a photo of something very small and make it look big.”


DJ_StoneHenge

1st Composite: DJ reportedly “eats” left hand side of mushroom and grows huge (DS106 Google+ Community post  )

Some little blonde girl gave DJ a mushroom while visiting Stonehenge. He took a bite of the lefthand side before we had a chance to stop him. This is the result.  No need to worry though. He took another bite on the right hand side and was back to normal by the time we returned to the tour bus.

Let The Riffing Begin!

Nov 11, 2013 @12:14pm (6:14pm Scotland, 8:14am Hawaii )

DJ-Stonehenge-mushrooms

Riff 1: John Johnston discovers mushrooms sprouting up at Stonehenge and posts to DS106 Google+ Community

Nov 11, 2013 @1:52pm (9:52am Hawaii)

DJ-Alice

Riff 2: Cathleen Nardi reports that it was all in Alice’s mind and posts photo to DS106 Google+ Community

Nov 11, 2013 @11:38pm (Minnesota, USA)

It gets curiouser and curiouser with the addition of spinning mushrooms and a Cheshire Cat.

DJ-Alice-MushSpin_500px

Riff 3: Rockylou riffs on the evolving creation by adding spinning mushrooms and a Cheshire Cat to enhance the Alice in Wonderland story line. Posted to ds106 Google+ Community

Downloadable Spinning Mushrooms + Cheshire Cat Photoshop CS5 .psd

Downloadable Spinning Mushroom .psd

MushroomSpin-Transparent

Downloadable Cheshire Cat .psd

Cheshire_cat

Cheshire Cat GIF

Nov 11, 2013 @12:34pm (6:34pm England)

Mariana Funes shares this beautiful GIF  in a post to ds106 Google+ Community wondering how it was made.

smokecoffe_oph6aatl

Nov 12, 2013 @7:05am (Minnesota, USA)

Rockylou reports more mushrooms sprouted up over night and smoke is seen wafting up from behind. Observations posted to ds106 Google+ Community.

AliceDJ-MushSpin_Smoke_500px

Riff 4: Who could be hiding smoking their Hooka Pipe back there amongst the new patch of mushrooms?

Cropped Smoke GIF

smoke_RLLl

Downloadable Cropped Smoke .psd file

Nov 14, 2013 3:07pm (9:07pm, England)

Mariana captures Colin lurking in the trees, wondering what the cat is grinning at and is that girl going to throw him a stick or not.

I can see Colin coming out of the back trees to scare that grinning cat.  I was thinking about using  this http://theds106shrink.tumblr.com/post/58186170782/i-managed-to-get-colin-dog-to-wiggle-yes-the and adding it to it 🙂

AliceDJ-MushSpin_Smoke_500px-cd

Riff #5: Colin dog lurking in the shadows joins the fun with Mariana’s  post to ds106 Google+ community

Nov 14, 2013 @11:15pm ( Nov 15 @5:15am England)

Rockylou couldn’t stand seeing the rogue white background flashing through on the spinning mushrooms and fixed it while creating a new clean .psd file adding Colin dog as its own layer.

AliceDJ-Mush-CCat-Smoke-Colin

Riff #5 edit: Rockylou cleaned up the spinning mushroom GIF and created new .psd file with individual layers in comment to Google+ Community

Screencast tutorial on adding Colin to the Photoshop file as a single layer.

Colin Dog original photo by Alan Levine

http://www.flickr.com/photos/cogdog/10545712185/

Transparent .png of Colin

ColinDog


Nov 15, 2013 11:00am.

Alan Levine’s “radioactive” turquoise caterpillar joins in.  He’s last seen crawling up towards the mushroom patch in the back to check out if his buddy is back there.

Download the Photoshop .psd file here.

AliceDJ-Mush-CCat-Smoke-Colin-CatPil_2

Nov 20, 2013

Cathleen Nardi adds the rabbit hole we last talked about.

Alice in Wonderland with Rabbit Hole


Dec 06, 2013

In participation with the DS106 GIFaChrome final project Rochelle Lockridge adds a white rabbit popping out of the hole and turns it into a GIFaKidChrome image.

GAKC-AliceDJ-Mush-CCat-Smoke-Colin-CatPil_Rabbit


Meet Digital Diva Abby

Abby_CharlieBrown_500px

Abby & Her Charlie Brown Halloween Toy

Yesterday’s ds106 daily create tdc644 was all about capturing an image of a dog.  Although the suggestion was to either take a picture or to draw one and take a picture of that, I figured since I have the digital media already hanging out on my computer, why not go a step further and share my little doggie Abby on video and throw in a new GIF for good measure.

She’s such a media diva.  Or is it that I’m the digital media diva and she’s just an unwilling subject of my creative endeavors? But then how would you explain how she’s annoyingly tried to insert herself into a couple of my projects? [The making of the Obruni podcasts on the Scott Lo LoDown summer of 2013 and the Headless ’13 week 4 audio reviews.] Which subsequently required the editing out of her attempts to “audio bomb” my projects.  I’ll think I’ll leave those bits and pieces for an audio out-take reel if I ever decide to make one.

So here she is…..

AbbyDJRound_GIF2

Help! Mommy, help! Abby is gonna get me!

From Academia to Industry, from Bench to Plant. [3M-DS106 Repost]


Originally posted Oct 4, 2013 on an internal 3M blog by “HC” a 3M-DS106 Salon member

From Academia to Industry, from Bench to the Plant. (3M-DS106 Repost)

HCHeadlessGIF

“HC” 3M-DS106 Salon Member

This week one of my friends from Australia finally landed an industry position in the US after many years.  He did his masters degree where I was doing my postdoctoral research and that was when our path first crossed.  He later moved interstate to another university to do his doctorate (when I started working at 3M).  He finished his research and then went to Virginia Commonwealth University for his postdoctoral research.  As his project is winding down, he asked if 3M was hiring any inhalation scientists and at that time, we unfortunately weren’t.  Found out this week that he got into PPD (Pharmaceutical Product Development) in Middleton, Wisconsin and one of his first comments was that “Industry is so different from Academia!”

I agree with that statement, and now that I have about the same experience in industry (5 years at 3M vs 4 years as a research only academic) I see some similarities and a lot of differences.  Some people prefer the deep understanding that being in academia can get you while some prefer taking that knowledge and commercialise into products.  Academics live off grants (unless they get tenure, but even then, grants are still good), while in industry we use internal grants to fund research/development on projects that interest us and could lead to success for the business and company.  There are plenty of articles comparing the two ‘worlds’ and I probably won’t add too much wisdom to that body of work.

Having said that, one thing that my academia friends might not get to see is the manufacturing plants (or even those friends in Silicone Valley).  It is a complex facility that also require ‘magic’ to get products out.  This is where 3M also excels in, taking development from the bench and scaling it up in manufacturing.  Currently I am working through scale-up of one of the products that I am the project lead on and looking at the manufacturing path on how we can make the products.  We typically draw a schematic of the process flow but what if we can animate it to understand the flow better?

One of the DS106 assignments had a topic that is “Spreadsheet Invasion“, where you use a spreadsheet (in this case, Microsoft Excel) to do your animation on.  I decided to do a rough schematic that is kind of realistic (probably 80 % close) but not exactly the process I am using..

Spreadsheet Invasion - Example Manufacturing Scheme

This shows how complex the manufacturing process can be, with multiple inputs at different site locations.  It is also something we like to show how much work our Product Engineers do such that the end user does not notice any change in performance of the final product – that particular information has been animated using PowerPoint in a presentation and will not be shown here as it does show real actual manufacturing processes and the number of input materials as well as test standards to maintain.

Do most people know how complex manufacturing can be when they were still studying?

—-

Animated GIF notes:

  1. Planned the images to draw and the sequence
  2. Coloured the cells for the frame, do a screen capture of everything.
  3. Paste As New Layer in GIMP
  4. Save as GIF, as an animation.

Gifs, Gimp and Me (3M-DS106 Repost)

Originally posted 10/2/13 on an internal 3M blog by “JS” a 3M-DS106 Salon member

3M_JS I decided to go with the less creative title “Gifs, Gimp and Me” instead of what I originally thought of, which was “I ain’t no Gimp!” Which struck me as funny and worked on several levels but was a little unprofessional.

I am not a Gimp-ophile. Not by a long shot. I have learned several things, though, and I was able to create my own gifs! Thanks to the internet and what sounds like a preteen girl and a teenage boy. See videos below.

I downloaded Gimp and checked it out to see what I could intuit from it. The answer: NOTHING. I literally could not understand what any of the buttons meant besides the basic: line, fill, lasso. Very humbling. I felt very stupid.

So I Googled: “How to make a gif using Gimp” and got the Gimp website’s tutorial, a girl who explained how to make a gif of Jennifer Lawrence (Katniss Everdeen) shooting an arrow over and over and the boy who drew a stick figure walking. The Gimp website was less than helpful. I could not understand what they meant by “Gaussian blur” or “alpha to selection”. The girl and boy were much better. I learned about layers and timing and playback. (Which is located under Filters -> Animation -> Playback, by the way. Who knew? Talk about a steep learning curve).

I have a presentation coming up in which I will describe how a Flame Ionization Detector (FID) works. Just the basics. Of course, I get the brilliant idea that I will animate the FID diagram to literally illustrate my point. Because what could go wrong?

Have I mentioned that I like to tackle big projects instead of working through little ones first? I do that with baking all the time. Why start small and boring when you can do a BIG EXTRAVAGANZA with FROSTING and FLAVORS and COLORS! Except that it is often more difficult and frustrating than if you would have started small. But the emotional payoff potential is really big. Cost-effective? You decide.

There really is no stopping me – short of dismemberment – once I start so here I go….

The FID diagram by itself:

FID diagram

Now, I need to show that the separated gas coming from the column in the gas chromatograph hits the flame and is ionized. The resulting electrical charge creates a peak on the chromatograph which we can use to identify how much of that particular analyte is present. So easy even a caveman can do it!

My attempts to do this in Gimp resulted in disaster. I do not like how once you create a shape in Gimp it becomes part of the picture. You cannot move the shape without taking the background with it. I’m not used to this. When I create shapes in Excel they are independent until I group them together. I can move them alllllll over the place. It’s great. Not so in Gimp. You better get your placement right the first time otherwise you’re screwed. This is incredibly difficult to do when you are trying to precisely animate a section of gas moving through a column.

Also, each of the layers I created just compounded on each other so instead of the gas moving up through the column; it was just one long line of gas building on top of each other. I tried several things and Googled a lot. Nothing helped so I looked for an easier program. I downloaded Paint.net. Bad idea. Not any easier. So I switched to Paint. Still the problem with the whole placement thing but I figured out a way to get around it.

I am familiar with animation in the traditional, drawing sense so I knew that I needed a frame for each move and I needed the background to always be the diagram. I know that animators use transparent paper to see their changes and then add the background later but I couldn’t figure this out in Gimp. What I did instead was I created a single file for each of the frames that I would need. Starting from one frame, I copied the rectangle shape that I needed and noted it’s location on that previous frame. Then I pasted it in the next frame, same location, and moved it up two pixels by hand. Super tedious. But it worked.

I used that method of noting location and movement for the entire animation. The result: 95 frames cut down to 50 frames for a shorter overall animation time. Then, – thank you Katniss Everdeen Gimp girl! – I used Gimp to take all my frames and put them together in an animation. I thought the animation went too fast for the flame part so I went back and changed the timing on the last few frames – thank you stick figure Gimp boy! (This can be done by right clicking on the layer, selecting Edit Layer Attributes and putting the frame delay (in milliseconds) in paranthesis next to the layer name. Like this: “Layer 1 (250ms)”. The default layer delay is 100ms.)

Here is my animation:

FIDAnimation

 I also wanted to signal heat for a different part of my presentation so I made this simple one using Excel to create the shapes, copying them into Paint to make it a .png file and then Gimp to animate my two frames. Much easier!

Here is heat:

Heat

Next post – getting rid of the background in your picture (.png) using Gimp!

Story Telling, Dance and Product Development (3M-DS106 Repost)


3MCenter_2
Originally posted 9/30/13 on an internal 3M blog by “HC” a 3M-DS106 Salon member

Sorry that I haven’t taken the time to write a blog post recently, it isn’t from the lack of interest but the lack of time due to various project related pressures all coming together at the same time.

As we have given away our TV about 6 months ago (we gave it away because we noticed we haven’t plugged our TV into the power socket for over a year), we haven’t been following what is the latest in TV apart from what one might read on blogs, newspaper articles or hearing this or that.  Manly what has gone viral (or back in my day, ‘hot’).

Talent shows usually get a lot of press and in themselves, there are stories about their background.  This time I am looking further than that in the case of Kenichi Ebina, the winner of 2013 America’s Got Talent (AGT).  Having found out that he won, I went back through his previous performances and agree that they are all amazing.  Unfortunately my curiosity told me to look into his back catalogue of performances online, all the way back to 2001 when he won with the group “BiTriP”, including a presentation at TED in 2007.

Back then, he was a good dancer but compared to what he can do now, he would be considered moderately good.  What captured my attention is his toolbox of ‘tricks’.  He has been building his toolbox since the beginning and not only replacing tools that doesn’t fit in the set but polishing those he use so it is shiny and fancy when it is pulled out.  The moving light tricks as well as the pulling of the clothing forwards/backwards was shown in the TED presentation, the sliding head and interacting with people behind each other was seen in 2001 with BiTriP just to name a few.  The use of video in the background is new in 2013 and that fits in quite well with the DS106 course.

One of his ‘wow’ performance in AGT was his ‘flying’ during his performance, using a strobe light to assist in the viewer’s experience.  There was a lot of gasps and clapping when he executed this move:

KE_FlyingIntoHeaven

In 2011 at a break dancing convention in London, Kenichi was in this performance and the finale was the strobe effect of this Ninja being ‘born’ and in action.  The segment was longer than I am showing but this literally is the last thing the audience sees (he starts to fly around in a circle before this final leap and then all goes dark for the end).

KE_FlyingNinja

The audience (different ones) also gave the same gasps and clapping from amazement.

So what does all of this have to do with product development?  I personally think this is what some good product developers probably have been doing and they may or may not know it:

  • 1) Build your toolkit (e.g. dance moves).  In 3M, the technical employees have access huge toolkit to work with (our Technology Platforms – Click on the technologies menu title to view.) as well as ones being developed at the bench.
  • 2) Test out the technologies in prototypes (e.g. various performances).  Take them out for a spin to see and understand how it works and is it something you can easily work with.  Polish it as you work on it.
  • 3) Build a story on how your product will work for the end-use, using the technologies you incorporate into it (e.g. choreography to tell a story).

I remember my mentor (now retired Carlton winner and Corporate Scientist, Wayne Dunshee) telling me once that I should be building and working with different technologies as well as understand how they can interact with each other then put it on the shelf.  Wait until there is a need for it and you can go back to your shelf, polish it up and there is your product.  Of course there are other steps involved to bring it through commercialisation.

Any product developers (seasoned and new) out there like to comment on these thoughts?  I am still a ‘fresh’ product developer in the 3M community so any comments are welcome.


For those interested, here is the background notes on how I made the two animations without the annoying “flashes” (the flashes is actually what you want).

1) I went to youtube.com and downloaded the mp4 videos containing the clips I am interested in.  There is probably a better way to do it without getting the whole video (which themselves are large in size) but I don’t know yet.

2) Using Windows Movie Maker, I opened up the large files, clipped out the few seconds of interest and saved those clips.

3) Found this program called Super (C).  It supposed to be able to do multiple video format conversions but be very very careful in how you install the program.  The program itself is free, but they have this installer that asks lots of questions if you want to install stuff – but it isn’t for the actual program itself!  I kept saying no (or having to find out how to say now) before it ran out of junk software to install, then the installer disappears and then the proper installer for Super (C) opens up and installed quickly without issues.

4) Ran Super (C), dragged-dropped the .wmv  (saved when I used Movie Maker) clips and selected the output as gif and let it do what it advertised it can do – and it does.

5) Opened GIMP and loaded the animated GIF file and then scrolled through to copy the frames where Kenichi is lit instead of the black background.  I pasted those frames into a new GIF file with a black background.  Set the frame rate appropriately and then saved the animation.  Feel free to download these files and rip them open in GIMP to see the individual frames I took.