Category Archives: 3M-DS106

Sharing to Learn – Learning to Share

Reposted from a June 24, 2014 3M-DS106 Salon Blog Post.  All proprietary information has been deleted from this public version.


Internal 3M Spark Post to R&D Community:

Rochelle Aug_07_Hand

Sharing to Learn – Learning to Share
Posted by 3M-DS106 Salon Patroness Rochelle Lockridge

The @3mds106salon continued our June topic discussion on data visualization.  Having a bit of fun I showed up and shared a chart I’d made for the children’s story “Goldilocks and The Three Bears”. The chart was harder to make than I expected.  Receiving feedback and hearing what others would have done provided a tremendous amount of learning directly relevant to my job.  Check out the original & revised version as well as an animated GIF heat map by @Justin.  Play is good!


Today’s 3M-DS106 Salon was visited by 4 of us:  Rochelle, Justin, Tony  & Sharon

We continued our discussion on data visualization which was our topic of focus for June.  (See list of links below.) As the patroness/host of the 3M-DS106 Salon I had been pondering how I could more effectively bring the digital storytelling aspect into our group. (After all, that’s what the DS stands for. :)) I knew from my experiences with the external DS106 that I had learned a tremendous amount of very relevant digital literacy skills by playing and having fun with the DS106 community  But it’s a tough sell these days to get people to play here at 3M.  We feel play is a waste of time.  That we should be doing something more productive with our time.

  “Anthropologist Gregory Bateson believed that the fixation on making everything productive and rational cuts us off from the world of the spontaneous that is home to real knowledge..Play isn’t a character defect; it’s the builder of character, developing persistence, competence, mastery and social skills that take us beyond perceived limitations.” [Source] 

I am here to report that my supposedly non-productive activity (even I was questioning it.) of creating a data visualization for Goldilocks and The Three Bears was not a waste of time -for me or today’s Salon attendees.  Sure I learned more about struggling with Excel and formatting a slide that was informative and attractive. (See my process below.) When I shared it with my colleagues I learned even more as they easily shared their suggestions on how to improve my slide by limiting the amount of text, making things more visually simple so that at a glance a viewer can get most of the information and changing from a solid fill to an image fill on my bars.  However, it wasn’t until the rest of the group started to share how they would visualize the data and story that a deeper layer of learning emerged.  I got it that DS106 and the 3M-DS106 version we’ve been building isn’t just about creating digital artifacts and sharing them with others, it is also about the learning that occurs when others share with us.

When I heard how Sharon might adjust the bar chart, how Tony would display the data as a color coded cross table, and Justin’s idea for a heat map and an animated GIF, Well I was blown away.  Wow.  This is where the power is.  I was “playing” to learn more about a subject I was interested in – In this case data visualization and effective Power Point slides. I bravely shared what I had made with the group. Because of the relationships we have been building there was a comfort to continue sharing thoughts and suggestions with one another. I learned how they would do things differently than me, and knew  that I would use that knowledge the next time I had a 3M project that required data visualization.  I also walked away today with a deeper understanding of why I created the 3M-DS106 Salon; why I continue to do the assignment preparation work; why I hold meetings every Tuesday;  and why I attempt to write a summary post following our gatherings.  I am promoting a safe place for others to learn to share and their sharing is helping us learn more  together.  It’s all good for 3M.

Amenity/Hospitality Ratings for The Three Bears Cottage

What I assumed to be a slam dunk creating a chart in no time at all, turned out, when I actually set down to make it,  to be quite a bit more difficult than I had imagined.  I had several variables and labels:

  • The three bears- Poppa Bear, Mama Bear, Baby Bear;
  • Porridge- Initially too hot for all three bears then: Too hot, too cold, just right;
  • The chairs and beds:- too hard, too soft, just right.

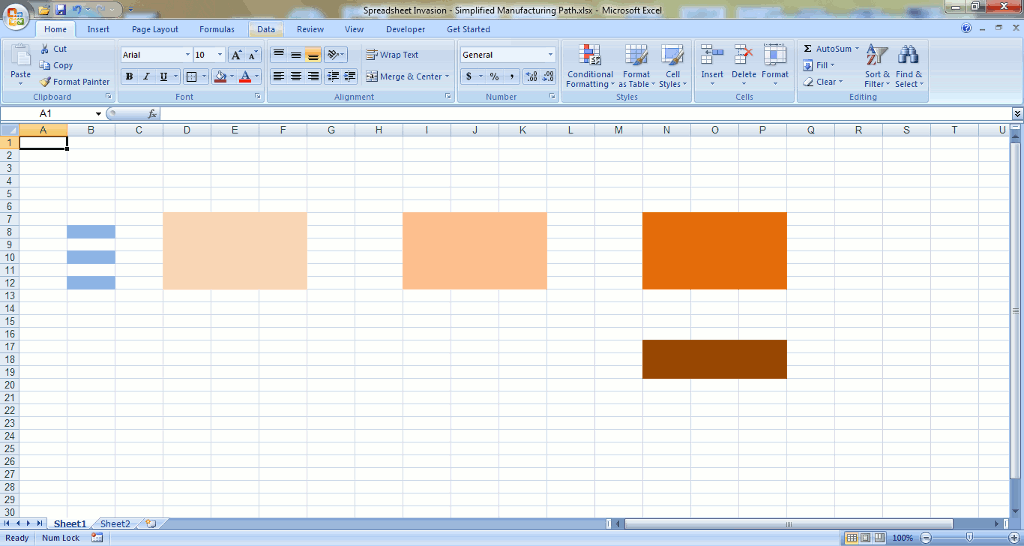
I tried creating bubble charts, x-y scatter plots, different styles of bar charts.  I finally settled on a basic horizontal bar chart.  Defining which data would represent the series and which simply data was tricky.  I kept ending up with the data points on top of one another.  It was frustrating that I couldn’t get it.  I don’t know if I was just tired or what.  Once I had the basic chart I wanted to make the slide readable and appealing. I added an informative title,  I increased the font size on the axis labels to 18pt. I found some graphics on the web to illustrate the amenities being rated. With the addition of a text box on the side, “Baby Bear was Just Right”, I wanted to communicate the final result of the “data analysis”.   My final touch was the addition of evaluation comments for each bar, such as Too Hard, Too Soft, Just Right.. I agree with the group that adding the individual evaluation comments was too much for this slide.

Tony suggested uncluttering with the replacement of the solid fill on the bars to images- for example 6 beds for Baby Bear’s ratings and 1 bed for Mama Bears.

Select data point bar => right click => Format Data Options => Fill => Picture or Texture Fill =>Insert picture from computer  file => Choose file from computer => Stack and scale with 1 unit per picture.

This would allow for removal of redundant text.  I’ve revised the slide with their comments in mind and created a new version below with more graphics and less text. Also using color coding more effectively by matching the clothes of the bears to the amenities.

Then Justin showed us quickly how he would make a GIF that could illustrate more of the unfolding story as well.  Take a look at it below.  And he’s posted the how and why of making the GIF on his blog too. How might you create an effective data visualization for Goldilocks and The Three Bears.  If you actually make something, you might learn a bit yourself. If you do, I’d really appreciate it if you’d share it with us so we can learn from you too.

VERSION 1:

Goldilocs-ThreeBears-Small

REVISED

Less text, more graphics, color coding, removal of axis. I’m still not sure if this works yet or not.  Is it clear that I am using a 1-6 rating system, with 6 being the best?

goldilocksratings_revised

Justin’s Animated Heatmap Example:

3m-ds106_goldilocks_quick_gif_concept_


Comments: 

I had another commitment and was not able to attend. I hope the following is useful. Looking at either of the two slides above, I found myself struggling with confusion interpreting the length of the bar chart, or the number of objects (representing hardness or temperature). I started out with the idea that the charts showed the hardness or temperature of the objects, rather than the goodness of fit.

To me, it would have been much easier to interpret a chart that put the ‘value to the customer’, or ‘match to Goldilock’s preference’ as a dependent variable on the Y axis and the independent variables (hardness, temperature) on the X axis, and you could even estmate a bell-shaped value curve to show the ‘sweet spot’ where she preferred to be. If I get time later today, I may try to give an example, but perhaps the text is sufficient.

Hoping this input is as welcome as you usually are to my thoughts. . .

BD

Here are the charts referred to in my comment on Rocky’s earlier post re Goldilocks.

GoldilocksCharts_BDower


JUNE DATA VISUALIZATION TOPICS AND LINKS

Data Visualization:

Writing References. YUCK!


OER14 3M-DS106 Trailer

Collaboratively writing a paper and presenting at a conference with two people I’d never met in person was a fantastic learning experience from start to finish. It is totally amazing to me what can be accomplished within the digital realm I’ve landed in with the DS106 community.  I didn’t really experience anything different from doing something like this in person, except that when my ego or perfectionistic habits flared up I had a chance to step back, breathe and get myself focused back to what was best for the paper.  I’m sure each of us had that experience at one time or another, and our higher selves always won out. (The time zone differences helped with that too. 😉 ) I can’t express my appreciation enough to my co-authors Alan Levine and Mariana Funes for their skills, professionalism, creativity, and sense of adventure we’ve shared the last 6 months.

“This case study explores how DS106 tools, methodology and philosophy were adapted into the corporate world at 3M to build community, collaboration, and effective global communication skills. Our hypothesis was the pedagogy and assignments of the DS106 open course could be modified for delivery on a corporate intranet, using internal creation and communication tools standard for 3M employees. We hoped to learn how the course experience could work within cultural and technological constraints of a corporate environment.”

Lockridge, R., Levine, A & Funes, M. (2014). A DS106 Thing Happened on the Way to the 3M Tech Forum. In Proceedings of OER14: building communities of open practice. Newcastle upon Tyne, England.

But what I wasn’t planned on learning, and wished that I could take back those 6+ hours of tedious OCD inducing labor back in February, was how to write the required (and admittedly very important) references for our OER14 paper to conform to the styles of the Publication Manual of the American Psychological Association (http://www.apastyle.org).  What kind of sick personality makes these things up?

Conform to the styles of the Publication Manual of the American Psychological Association (http://www.apastyle.org). Citations in the text appear in parenthesis as (Author, year) or (Author, year: page). If the author’s name appears in the text, as Author (year) or Author (year: page). Full citation of literature referred to should be given in References. Arrange the references alphabetically by first author’s name, rather than by the order of occurrence in the text. Punctuate and capitalize as in References of this document. Do not use numbered references or footnotes. References should use the style “reference-list”.

Ku, G. (2008). Learning to de-escalate: The effects of regret in escalation of commitment. Organizational Behavior and Human Decision Processes, 105(2), 221-232.

For further examples see a summary of APA guidelines provided at http://www.library.cornell.edu/resrch/citmanage/apa 

Seriously

******************

From: Rochelle Lockridge 
Date: Wed, Feb 26, 2014 at 11:48 AM
Subject: Re: attached are my final edits.
To: Mariana Funes 
Cc: Alan Levine

Spent another 4 hours formatting those stupid references according to the American Psychological Association, 6th ed.  What kind of personality makes this stuff up? By the time I do this again it will probably be outdated and everything I’ve learned this morning will be a waste of time.  GRRR!  I’ve actually compiled the links to the references I used to learn how to create the references. Do I need to make references to those in our paper too. <maniacal insane laughter>

  • When and when not to use italics (boy is that a can of worms)
  • In-text citation verses reference formats (Those commas, periods, spaces, & semicolon placements are a bitch to get right.)
  • Formats for different media, e.g. video, blog posts, newspaper articles, on-line articles, publications by corporations, websites,   (Still a little fuzzy on the formatting for the DS106 website. I say put it back into the text of the document.  We know how to use it correctly there.)
  • The new addition says they favor [blog post] over [weblog post]
  • Citing a personal communication. “DO NOT include in reference list, only in text”
  • Do not include retrieval date unless the source material will change over time (like a wiki page) or it’s a link to a corporate website that doesn’t have a date listed on the source page.
  • Citing & alphabetizing multiple references in the same year from one author.
  • Multiple references from the same author but different years do not use the a, b, c designation.  The year is all you need.
  • Retrieved from not From

Link to paper A DS106 Thing Happened on the Way to the 3M Tech Forum. Do me a big favor and at least read a couple of the painstakingly formatted citations at the end of the paper.  I need to know that someone out there found them of value, other than the entertainment value had by the person or persons who create these insane style formats.

 ****************

Here you go. My links to references about formatting references in case you ever, like me, naively decide to write an academic paper that requires the apa style format.

Postlude:

After doing all this work and whining about it to my daughter, she tells me there are computer programs out there that will do this type of formatting for you in a snap.  And once you have the basic information entered, you can very easily ask it to reformat for another style, say the Harvard Reference Style for example. She just happens to have a quality paid version on her computer that I could’ve used had she known what I was doing.  AAAHHH!!!!

Gah

DS106 Rocks!

DS106 ROCKS! 3M-DS106 Salon Patroness admiring the work of her co-collaborators for their OER14 paper.

If you’ve been following my communications out to the world over the last few days you know that the OER14 paper, “A DS106 Thing Happened on the Way to the 3M Tech Forum” that Alan Levine, Mariana Funes and I were writing was joyfully submitted on 2/27/14.  We’ll be presenting our 3M-DS106 Salon work at the end of April in Newcastle, UK. (Link to keynote speakers and panel members) For more see my post 3M+DS106+P2PL=OER14+M2M,  which includes a video I created from interviews with the 3M participants and the original abstract for the paper.


The Art used for making the “art”:

With my focus on writing the paper (and my paying job at 3M that is making all of this possible) I haven’t taken much space to create something just for fun.  As soon as the paper finished I jumped back into the “art” game and used the opportunity to show my appreciation for my ‘partners in crime’:  Alan Levine, Mariana Funes, and Giulia Forsythe. (Who at our hopeful request in the final week, does what she does best, doodled a wonderful image to capture the paper beautifully.)

OER14-GiuliaForsythe

“A DS106 Thing Happened on the Way to the 3M Tech Forum” illustrated by Giulia Forsythe (@GiuliaForsythe on Twitter)

As usual, ideas emerged and morphed as I was in creation mode.  The first image created was of the three of us enjoying our time in the Salon. It was sparked by an innocent comment from Mariana on the final draft of the paper and the resulting Twitter DM exchange.

MF: This is now icing on cake – but did you not have a wonderful photo of the Patroness in the days of yore in one of your posts? Could we add it here? And gif it? No. Kidding.”

RL: Thx for final comments. Especially reference comments at end. Are you truly serious about inserting the Salon GIF into our paper?

MF: I would love it. You think it is too much? It would be still for printing but could be a lead in to gif 4 work? or the 1 with work process? would be nice to have something stand out in the dull dull proceedings 🙂 it is a work thing for u so yr call!

There were many layers and tools used in re-making the paintings.  All were produced in Adobe Photoshop CS5.  The more advanced transformation tools available over Photoshop Elements allowed me to do things like warp the little red 3M on the envelope on the side table and Giulia’s doodle seen in the lap of the Salon Patroness, Madame de 3M106 .

I was fortunate to already have Colin the Dog (seen at our feet), and our three heads cut out from previous projects. The biggest issue that took A LOT of time futzing around was matching the color and texture of the new heads to the rest of the painting.  With these two projects I’ve (rather painfully) moved beyond the novice stage of applying layer mask effects. It’s easy once you get it – sort of like making a GIF. But up to this point it was more of an accident than a purposeful action.  See that little check box (Which pops up when you are creating a new layer.) next to “Use Previous Layer to Create Clipping Mask”? We are now best friends.

LayerMaskWindos

Not yet totally familiar with all of the layer effects and filters, I just kept trying stuff out until it looked sort of like I wanted.  I’m not 100% satisfied with the results, but it’s a long way from when I first started. (Nana-Tina-Little Alan REDOI still need more practice.  Look closely and you’ll also find DS106 on the back of the couch on the left side of the portrait and an OER14 on the right side of the mantle. 

But I really like the efffect of the rocking DS106.  This was one of those instances of serediptity.  I wanted to turn the still image into a GIF.  Nothing in the new image stood out as a piece that could be GIFed without what looked to me a lot of work.  I decided to try making the DS106 flash.  Again, playing around with the layer style effects I ended up with some modified images that would give the original flashing illusion I was intending. But stepping back and taking another look, I noticed something I wasn’t expecting. It turned out that creating the animation frames by turning off and on the layer effects of drop shadow, satin and emboss, it gave the DS106 the illusion of rocking in 3D behind my head. I love it when these things happen.

Mariana explains this well in an early draft of our OER14 paper.  (We had to reduce the word count from 6,000 down to 3,500. A lot of good stuff was left on the cutting room floor.)

Default open cultures generate the environment needed for innovation and creative thought. Zweig (2011) suggests that generating an environment that enables ‘structured serendipity’  may help us be more creative. From a cognitive perspective, Funes (2003) research suggests creative thought has at its core ‘bridging’ activity; creativity happens at the point of discontinuity when bridging from one domain to another. DS106 teaches bridging through an environment of structured serendipity via its focus on what Rheingold (2014) describes as ‘product orientation’ but is referred to in the DS106 open community as ‘Just make art, damn it!’

Credits for DS106 ROCKS!

Original painting: ‘Madame de Pompadour’ by François Boucher

Wall Painting Riff:

I cut out the center section of this original painting by Jean François de Troy (Paris 1679 – Rome 1752), “Reading from Molière” around 1728 found on Salon (gathering) Wikipage

Jean François de Troy (Paris 1679 – Rome 1752), “Reading from Molière”

I use a riff of this painting as the 3M-DS106 thumbnail image.

DS106 walkers small

Side Note:

I was formatting references for the paper for 6+ hours all told.  I’m going to get as much mileage out of that tediously boring work as I can.


3M+DS106+P2PL=OER14+M2M


At the end of April 2014 I’ll be attending the industry’s largest global M2M (Machine to Machine) conference in London as part of my strategic analyst job at 3M. But what’s that got to do with DS106 or OER14? And what’s with that P2PL in this post’s title? Let me explain.

At 3M I get paid to study companies and technologies relevant to the Electronics and Energy business group that I work in. That’s how I discovered DS106. I was asked to look into this new phenomenon called MOOCs and see if there was anything of interest for the group.  What I eventually learned was that DS106 was no MOOC. But it was, at its best, a peer-to-peer learning (P2PL) experiment where we learn from and teach one another skills that can help us to maneuver and communicate more effectively in the social media and digital world. Dare I say it? …by playing and having lots of fun in the process.

3M-DS106-GoldGuys_ShakeHands-4My initial foray in the summer of 2013 into the open on-line Digital Story telling course DS106 out of University Mary Washington, led me to organize an internal version of the “course” at 3M (3M-D106) to run in parallel with the loosely organized DS106 “Headless 13” session (Aug 26th thru Dec 13, 2013). My intention was to modify the open on-line course materials and methodology for use behind the 3M Firewall to help myself and my fellow technical 3Mers become more fluent with the digital communication platforms provided by 3M.  There is a need and expressed desire to improve the effectiveness of our communication, especially with our global colleagues.

3M-DS106 Final Project:

As a final project for 3M-DS106 I created a short video of participant experiences. “3M-DS106 is Open For Business”

yu garden cropped

Bill Dower 3M-DS106 Participant

To make it easy and time efficient for scheduling and editing I recorded Skype conversations from five participants, then reduced 3+ hours of audio down to 8 minutes using GarageBand 11 on my Mac. Achieving a logical flow to the storyline of the audio was a bit of a challenge. I had originally intended to break it into sections with snippets from each person, but that turned out to be too choppy and disjointed. Organizing by person provided a better overall feel to the audio.  But I did choose specific topics to emphasize and made sure to include important points each interviewee themselves was emphasizing during our conversation: Like the concept of having tools in your tool box, participants teaching and learning from one another (the P2PL (peer-to-peer learning) reference in the title), and Bill Dower’s passion for more effective global communication where English is not the first language for all parties involved.

At this time 3M does not have a good way to stream audio.  We do, however, have what would amount to an internal version of YouTube. I could easily post a video that would be readily accessible by all 3Mers using the my video editing software Adobe Premiere Elements 11 for the Mac.  And since it was now in a video format, it was a logical extension to add a few images to liven it up.  I could add images of their projects and their photos.  I started out with photos taken from their 3M on-line profiles, but the resolution was very poor.  When I asked for higher resolution images, to my surprise people started sending me more personal shots of themselves out in the world. The interviewees also suggested the addition of the 3M division they worked for and their location. These were delightful additions that I hadn’t planned or anticipated.  They made for a better end product that could reach a wider audience internally and externally.

Jenna-Text

Jenna Sander: 3M-DS106 participant (Link to a sample of her 3M-DS106 projects.)

OER 14 & M2M Conference

And the whole experiment was successful enough that Alan Levine, Mariana Funes, and I submitted an abstract to present a short paper at the OER14 (Open Education Resources) conference on April 28-29, 2014 in Newcastle upon Tyne, England.  Our abstract was accepted with flying colors (See below) and hopefully all three of us will be in attendance.

This brings me full circle to how I have found myself attending the M2M (Machine to Machine) conference in London from the 24th-25th.  When I am traveling I try to find a conference nearby that may also be of interest for 3M.  In my usual fashion I went to Google and started a search for energy and electronics related conferences in Europe around the dates of OER14. Believe it or not, the first one that popped up was the M2M conference. I made some inquiries around the web and with people in the know in this area at 3M. (More peer-to-peer learning) It turned out to be a premiere conference and I was easily supported to attend.

3M + DS106 +P2PL = OER14 + M2M

********************************************

oer14_logo_web_HQ

OER 14 Abstract (Reviewer comments included at end.)

Newcastle, England 28-29 April 2014

Title: A DS106 Thing Happened on the Way to the 3M Tech Forum

Authors:
Ms. Rochelle Lockridge, Strategic Analyst, 3M
Mr. Alan Levine, Educational Consultant, CogDog It
Dr. Mariana Funes, Cognitive Coach

Introduction:
DS106 (http://ds106.us) is a computer science course in digital storytelling at the University of Mary Washington (UMW), framed on principles of the web as a platform for storytelling. Students learn to manage their own digital domain in the process of understanding storytelling and creating media. In 2011, ds106 opened up to a global community of online participants.

This case study explores how DS106 tools, methodology and philosophy were successfully adapted into the corporate world at 3M to build community, collaboration, and effective global communication skills.

Participants in 3M-DS106 were based in Minnesota, Texas and California. A majority were active members in the 3M Technical Collaboration chapter, a subset of the 3M Technical Forum (12,000 plus global members), which fosters communication across a diverse technical community.

Our hypothesis was the pedagogy and assignments of the ds106 open course could be modified for delivery on a corporate intranet, using internal creation and communication tools standard for 3M employees. We hoped to learn how the course experience could work within cultural and technological constraints of a corporate environment.

Methods:
The open ds106 course evolved from years of undergraduate courses at UMW. With no course offered for Fall 2013, a teacher-less open online version was built from previously offered classes.

3M-DS106 began with an open invitation to several hundred users on Spark (3M’s Twitter equivalent for their technical community). As a network connector, Rochelle Lockridge customized and re-published assignments from the open ds106 class and shared back to the open community the activities of the 3M participants.

The 3M-DS106 structure included weekly online web meetings held over lunch, to discuss assignments, which were done independently using 3M blogs and Spark as communication tools.

Results:
The 3M participants were interviewed at the end of their experience. Their blogs record their growth and reflective practice. In narrating their processes, they found value in giving and receiving feedback via comments, and were developing a greater capacity for relationship building. With more comfort in using creation tools and 3M’s social networking platforms, they increased their effectiveness for technology transfer.

Participants identified a need and desire for integrating the course experience into their technical work. Using tools in real time on 3M related projects within a community of learners to provide support, was deemed a highly effective practice.

Discussion:
The global 3M environment demands a quicker flow of information/ideas in a mode that is more conversational than the corporate norm, with the added challenge of consideration and protection of proprietary intellectual property.

With the success of this experiment, the 3M Technical Collaboration chapter will sponsor a yearlong 3M-DS106 course to provide participants more time, flexibility and practice with a monthly focus on topics, and incorporation of more communication tools specific to 3M.

This experiment shows that an open course can be adapted in a business environment, but more importantly a community that is larger than a single course enables success when the boundaries between groups are blurred.

 ***************************************


REVIEWER COMMENTS: Our abstract rated excellent for communication and overall impression for 2 of the 3 reviewers.

REVIEWER 1: I couldn’t imagine from the title what to expect from this abstract, but reading it gave me several moments of pure, unadulterated OER joy. I imagine this will be a VERY popular talk at the conference as it exhibits a rare – and highly successful! – interaction between an online, open course and an unrelated major corporation. This looks to have been a *very* important experiment and one of which the OER community needs to be aware, as OER segues into the mainstream. I wholly endorse acceptance of this paper for OER14.

REVIEWER 2: Excellent, this is a unique and engaging study that will attract large participation at the conference. Challenging corporate and open education norms with insights from participants working across groups and pedagogies, this abstract offers an unanticipated angle on the much loved DS106.

REVIEWER 3: I am very interested to see how these techniques translated to the corporate world and what 3M perceived value is as well as the participants.


DS106 is #4Life AND #4Work

00_Rochelle3MThumbYou haven’t seen much of me the last couple of weeks, but it’s all good.   I’ve been busy applying DS106 to my income producing job at 3M.  Because of what I’ve learned over the last few months, some directly from the CogDog himself, Alan Levine  behind the scenes, some from the DS106 course work, some from other on-line participants, I have been able to incorporate several new digital communication tools like Storify, Twitter, blogging, WordPress, HTML and GIFs to increase my effectiveness as a business opportunity and technology analyst.  Here I was thinking I was “goofing-off” and having too much fun with my DS106 obsession.  Then wham… the week before I leave for my annual fall meditation retreat up in the Rocky Mountains everything falls into place.

  • My boss likes what I can do with Storify and has given me permission to try out the business level subscription for a couple of months.
  • I built a new WordPress website in just two days that will provide an excellent user interface and location for me to organize the company analysis information I gather for my business group, Energy and Electronics, at 3M.
  • I’m establishing a new external on-line presence as Rochelle Lockridge the professional 3M employee: (@rllockridge Twitter handle) which is separate from my personal digital presence as Rockylou.  RLLockridge@mmm.com will be keeping up-to-date on what’s happening with the technologies and companies she needs to follow.

Without this course and the people who make it what it is, I never would have been able to do all of this.  Everything has come at the right time, with the right people showing up in my life, when I didn’t even know I could benefit from this kind of help.  I’m glad that I read about DS106 while studying about MOOCs for a 3M project and got in touch with Alan Levine.  The rest is history. 🙂

So that brings me to the present and moving into the future.  I’m in the process of co-organizing a final project for the 3M-DS106 Salon around collaboratively creating a video documentary (for lack of a better term) that shares our experiences and projects that we will then post to YouTube.  The group has lost momentum over the last few weeks as the greater DS106 community was working on audio.  This will perk them back up. And I’m hoping even some of the 3M “lurkers”, as we’ve been calling them, get involved too.

My plans are to ask them what else they want to learn about and practice with respect to digital communication tools and our internal social platforms, and then build that into the way we create the video.  We will most likely be using many of the same sorts of collaboration tools we used during the making of the DS106 radio programs- like Google Docs, Google Hangouts, Skype, Twitter – but with our internal 3M versions of the tools: share drives, Level 3 Global Crossing, SPARK, IBM Connections Communities.  It might be fun to have a few other DS106ers who’ve been following my little experiment and have been commenting to participate in some way too.  Maybe creating a video clip or doing a recorded Skype “interview” with me that we can include.  If you’re interested contact me.

If this goes well, it will be made public and it might be of value as an introductory tool for others who plan to be working with industry “inside the firewall”. Or perhaps as supporting data  if you need to show your school administrators why the skills taught in DS106 are relevant when your students graduate and enter the business world.

DS106 has made a significant impact in my life that makes me want to share it with others.  This is yet another way to do that.  Oh… by the way… I do plan to keep the 3M-DS106 Salon open and run this again.  Hopefully with another external course going on, but will do it on my own if need be.

Modifying DS106 to Work at 3M

DS106 walkers small

3M-DS106 Wall Walkers courtesy of “BD”

The pace of the open-online digital storytelling course DS106 is challenging – to say the least.  And the 3M-DS106 Salon  members and a few other 3Mers have been squeezing in time for lurking, learning, and creating digital storytelling projects relating directly to their jobs at 3M.

The external Headless ’13 DS106 course is moving into advanced audio for weeks 7 & 8 with a big emphasis on forming teams to create a radio drama.  We’re going to slow it down a little more to give the 3M participants the opportunity to go over some material they were interested in, but didn’t have time, and/or to strengthen the digital communication skills we’ve already been working with.

Some fine 3M-DS106 (non-proprietary) projects already completed:

ProjectsAs creative as I am, even I couldn’t see how 3M would benefit from the  3M-DS106 Salon  members creating a radio show.  Perhaps practicing our collaboration skills, but this particular group knows what they’re doing in that arena.  I’ve suggested we take this time instead to populate our 3M-DS106 project bank. One of the best ways to learn how to use the digital communication tools available inside and outside of 3M is to put them into practice.

LEARN BY DOING AND SHARING!

And then sharing what you did so that you can inspire others and they can build off of your learning.  Our 3M-DS106 project bank wiki, built on the Lotus Notes Connections Communities platform, is being used to document our 3M related projects in each of the DS106 assignment categories: audio, design, video, visual,web, writing, animated GIFs.

Examples:

Below is a screen shot of the project bank as it stands today.

3MProjectBank_ScreenShot

3M-DS106 Salon Project Bank Screen Shot – A 3M Lotus Notes Connections Community

I’ve challenged each salon member to deposit at least 2 projects into our bank over the next two weeks.

Project Bank Deposit Procedure:

  • Step 1:  Identify 3M related digital communication projects you are working on now or have completed in the past. Projects from others are also fair game.  Just make sure you give credit where credit is due by including a link to their 3M Connections profile or e-mail address.
  • Step 2: Identify the digital communication tool category for the project and add the title into the 3M-DS106 project bank table .
  • Step 3: Go to the Wiki page identified in step 2 and create a new child wiki page for your project. (If you don’t know how to do this, now’s the time to learn.  Ask for help if you need it.)
  • Step 4:  Include actual examples with images and tutorials whenever possible.
  • Step 5:  Let the rest of us know you’ve made a deposit to the project bank by posting an entry in your blog or sending out a link on SPARK (3M internal equivalent to Twitter).  Sharing using both communication platforms would be even better.

Additionally, you’re encouraged to add examples to an existing project already in the bank.

******************************

This project bank structure is in the early development stage.  As we begin to populate it we’ll see what works and what doesn’t, and come up with ideas on how to make it better.  While we are constrained to using the software platforms that 3M has chosen to provide us at the moment – Lotus Notes Connections, SharePoint, Wiki Enterprise – I fully expect that together the 3M-DS106 Salon members will find a way to make it work.

How do you make a micrograph “pop”? (3M-DS106 Repost)

This is a repost from an internal 3M blog by “WS”3M-DS106 Salon member

How do you make a micrograph “pop”?

3MMMI’ve been in electron microscopy for over 10 years (my first class on the subject was in 2000), and something that took me a while to figure out is “how can I present my images?”

You’d think this is a simple solution, just throw them in PowerPoint and send them off.  But let me ask you this…what background color should you use to give the best appearance to your images?

Take a look below:

BugMicrograph

As seen, some colors help make portions of the micrograph image stand out while some make them appear ‘washed out’.  When I have a choice, I usually opt for a dark blue background.  It’s a personal choice.

But what about identifying items within your micrograph?  What color then???

Bug_FontColor

Font color legibility test.

Again, above shows some options.  What color do you use?  I generally like yellow or red depending on the features darkness in the image.  Sometimes white and black can get lost in features within the image.  The best answer is trying it out.

WARNING: If you are presenting – make sure, make sure, make sure, to test your images on the projector first.  Your PC screen is not like most projectors regardless of the color used.  Take the extra time to test your images on the projector and make sure the brightness and contrast levels on your images make them easy to view and follow.  Just my $0.02.

Note: The original nanoparticle image used for the internal 3M post could have been considered proprietary.  Rather than take the risk, we have substituted a public domain image of a bug from the Dartmouth College electron microscopy images gallery.

3M Comment from “HC”

It has been a long time since I sat down at a EM instrument and I had never thought to put a border around the image – very thought provoking. Would it also make sense to change the gray scale palette into a sepia one – kind of like false colour? It would at least stand out more than just regular EM images.

Another thing that one has to consider in identifying things in the image is also the font in addition to the colour. Since you are going to ‘overwrite’ something with the text, would it make sense to put a small background so the text pops through?

From Academia to Industry, from Bench to Plant. [3M-DS106 Repost]


Originally posted Oct 4, 2013 on an internal 3M blog by “HC” a 3M-DS106 Salon member

From Academia to Industry, from Bench to the Plant. (3M-DS106 Repost)

HCHeadlessGIF

“HC” 3M-DS106 Salon Member

This week one of my friends from Australia finally landed an industry position in the US after many years.  He did his masters degree where I was doing my postdoctoral research and that was when our path first crossed.  He later moved interstate to another university to do his doctorate (when I started working at 3M).  He finished his research and then went to Virginia Commonwealth University for his postdoctoral research.  As his project is winding down, he asked if 3M was hiring any inhalation scientists and at that time, we unfortunately weren’t.  Found out this week that he got into PPD (Pharmaceutical Product Development) in Middleton, Wisconsin and one of his first comments was that “Industry is so different from Academia!”

I agree with that statement, and now that I have about the same experience in industry (5 years at 3M vs 4 years as a research only academic) I see some similarities and a lot of differences.  Some people prefer the deep understanding that being in academia can get you while some prefer taking that knowledge and commercialise into products.  Academics live off grants (unless they get tenure, but even then, grants are still good), while in industry we use internal grants to fund research/development on projects that interest us and could lead to success for the business and company.  There are plenty of articles comparing the two ‘worlds’ and I probably won’t add too much wisdom to that body of work.

Having said that, one thing that my academia friends might not get to see is the manufacturing plants (or even those friends in Silicone Valley).  It is a complex facility that also require ‘magic’ to get products out.  This is where 3M also excels in, taking development from the bench and scaling it up in manufacturing.  Currently I am working through scale-up of one of the products that I am the project lead on and looking at the manufacturing path on how we can make the products.  We typically draw a schematic of the process flow but what if we can animate it to understand the flow better?

One of the DS106 assignments had a topic that is “Spreadsheet Invasion“, where you use a spreadsheet (in this case, Microsoft Excel) to do your animation on.  I decided to do a rough schematic that is kind of realistic (probably 80 % close) but not exactly the process I am using..

Spreadsheet Invasion - Example Manufacturing Scheme

This shows how complex the manufacturing process can be, with multiple inputs at different site locations.  It is also something we like to show how much work our Product Engineers do such that the end user does not notice any change in performance of the final product – that particular information has been animated using PowerPoint in a presentation and will not be shown here as it does show real actual manufacturing processes and the number of input materials as well as test standards to maintain.

Do most people know how complex manufacturing can be when they were still studying?

—-

Animated GIF notes:

  1. Planned the images to draw and the sequence
  2. Coloured the cells for the frame, do a screen capture of everything.
  3. Paste As New Layer in GIMP
  4. Save as GIF, as an animation.

Know-It-ALL Thru Storytelling

Rochelle and John at 3M

“It’s the undisclosed knowledge- the anecdotal knowledge.  It’s the stories that are missing. There’s an efficiency in story telling that you can not get from just the written text and then recorded videos.” – John Woodworth, 3M IT Manager

I am currently in the midst of coordinating  the 3M-DS106 Salon in coordination with the Fall 2013 “Headless” DS106 open on-line digital story telling course. One of my favorite technologies that we work with is audio, and I’ve been curious as to how or if podcasting might be an unexplored opportunity at 3M. So… last week I sat down with one of our 3M IT managers, John Woodworth, to discuss and record his thoughts on how vignettes and story telling can be used as an effective and often quite efficient mode of communication and knowledge transfer in the corporate environment.  John is an avid story teller who illustrated many of his points by telling a story.  As you can imagine, the time flew by and we talked for almost an hour.

This segment of my podcast experiment at 3M captures the second portion of our conversation specifically focused on story telling.  The first half on vignettes was much longer and needs to be edited to a more reasonable length or split into a couple of episodes.  If you find this interesting and would like to hear more, let me know and I’ll work up and post the remainder of our conversation.

  • +  Know-it-ALL thru Storytelling


Music Attribution: “Skirting Boards” by Bleak House (Creative Commons License)

NOTE: I want to apologize to John Woodworth and my listeners for the poor sound quality of the recording.  John sounds off in the distance with some annoying room echo.  I am still learning how to use my audio equipment (a Samson Meteor Mic plugged into an iPad using the Recordium App) and what room environments work best. (Definitely not John’s office with my set-up. I’m even wondering if I was actually recording through my iPad mic instead of the nice Samson.)  I did my best to try and fix it during post-production within GarageBand.  Most of the advice out there in Google Land was to trash it and start over again.  But one guy talked about how he adjusts the noise gate and EQ settings, and that it might take a second pass. I gave it a valiant effort, trying all sorts of different effects as well as what was recommended, and will do better next time around. What can I say in my defense… I’m a technical person by heart and enjoy getting out of my comfort zone to experiment with new technology. That’s one of the traits 3M hired me for!

Gifs, Gimp and Me (3M-DS106 Repost)

Originally posted 10/2/13 on an internal 3M blog by “JS” a 3M-DS106 Salon member

3M_JS I decided to go with the less creative title “Gifs, Gimp and Me” instead of what I originally thought of, which was “I ain’t no Gimp!” Which struck me as funny and worked on several levels but was a little unprofessional.

I am not a Gimp-ophile. Not by a long shot. I have learned several things, though, and I was able to create my own gifs! Thanks to the internet and what sounds like a preteen girl and a teenage boy. See videos below.

I downloaded Gimp and checked it out to see what I could intuit from it. The answer: NOTHING. I literally could not understand what any of the buttons meant besides the basic: line, fill, lasso. Very humbling. I felt very stupid.

So I Googled: “How to make a gif using Gimp” and got the Gimp website’s tutorial, a girl who explained how to make a gif of Jennifer Lawrence (Katniss Everdeen) shooting an arrow over and over and the boy who drew a stick figure walking. The Gimp website was less than helpful. I could not understand what they meant by “Gaussian blur” or “alpha to selection”. The girl and boy were much better. I learned about layers and timing and playback. (Which is located under Filters -> Animation -> Playback, by the way. Who knew? Talk about a steep learning curve).

I have a presentation coming up in which I will describe how a Flame Ionization Detector (FID) works. Just the basics. Of course, I get the brilliant idea that I will animate the FID diagram to literally illustrate my point. Because what could go wrong?

Have I mentioned that I like to tackle big projects instead of working through little ones first? I do that with baking all the time. Why start small and boring when you can do a BIG EXTRAVAGANZA with FROSTING and FLAVORS and COLORS! Except that it is often more difficult and frustrating than if you would have started small. But the emotional payoff potential is really big. Cost-effective? You decide.

There really is no stopping me – short of dismemberment – once I start so here I go….

The FID diagram by itself:

FID diagram

Now, I need to show that the separated gas coming from the column in the gas chromatograph hits the flame and is ionized. The resulting electrical charge creates a peak on the chromatograph which we can use to identify how much of that particular analyte is present. So easy even a caveman can do it!

My attempts to do this in Gimp resulted in disaster. I do not like how once you create a shape in Gimp it becomes part of the picture. You cannot move the shape without taking the background with it. I’m not used to this. When I create shapes in Excel they are independent until I group them together. I can move them alllllll over the place. It’s great. Not so in Gimp. You better get your placement right the first time otherwise you’re screwed. This is incredibly difficult to do when you are trying to precisely animate a section of gas moving through a column.

Also, each of the layers I created just compounded on each other so instead of the gas moving up through the column; it was just one long line of gas building on top of each other. I tried several things and Googled a lot. Nothing helped so I looked for an easier program. I downloaded Paint.net. Bad idea. Not any easier. So I switched to Paint. Still the problem with the whole placement thing but I figured out a way to get around it.

I am familiar with animation in the traditional, drawing sense so I knew that I needed a frame for each move and I needed the background to always be the diagram. I know that animators use transparent paper to see their changes and then add the background later but I couldn’t figure this out in Gimp. What I did instead was I created a single file for each of the frames that I would need. Starting from one frame, I copied the rectangle shape that I needed and noted it’s location on that previous frame. Then I pasted it in the next frame, same location, and moved it up two pixels by hand. Super tedious. But it worked.

I used that method of noting location and movement for the entire animation. The result: 95 frames cut down to 50 frames for a shorter overall animation time. Then, – thank you Katniss Everdeen Gimp girl! – I used Gimp to take all my frames and put them together in an animation. I thought the animation went too fast for the flame part so I went back and changed the timing on the last few frames – thank you stick figure Gimp boy! (This can be done by right clicking on the layer, selecting Edit Layer Attributes and putting the frame delay (in milliseconds) in paranthesis next to the layer name. Like this: “Layer 1 (250ms)”. The default layer delay is 100ms.)

Here is my animation:

FIDAnimation

 I also wanted to signal heat for a different part of my presentation so I made this simple one using Excel to create the shapes, copying them into Paint to make it a .png file and then Gimp to animate my two frames. Much easier!

Here is heat:

Heat

Next post – getting rid of the background in your picture (.png) using Gimp!