Monthly Archives: June 2013

LoDown Part Deux (EP:23)

[soundcloud url=”http://api.soundcloud.com/tracks/96080634″ params=”” width=” 100%” height=”166″ iframe=”true” /]

 Obruni PodcastsRockylou’s (Rochelle Lockridge‘s) first foray into guest hosting the DS106 LoDown (episode 17) was a success.  However, the original recorded “interview” between my daughter Amber and I, chatting about our experience producing our own podcasts, provided us with almost 30 minutes of airtime.  That was too long for the editing, post-production phase with the time constraints I was under.  And I sense our listeners aren’t so keen on sitting down and listening to something that long either.  So we decided to split it into two parts.

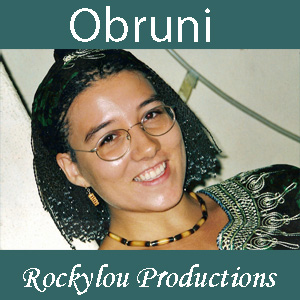
Amber is the author of our Obruni podcasts, based on short stories and letters she wrote as an AFS exchange student to Ghana, Africa in 2000.  In part two she shares the differences in writing for reading and writing for audio. We then pick up our sound effect conversation from part 1.  I was surprised to learn that her initial reaction when she sits down to decide on what sound effect goes where is:

“PANIC… I don’t know how I pulled this off last time… I’m never going to be able to do this again.”

…especially during those times when we needed to create our own sound effects like her head hitting a pillow at the end of the day, or her agitated shuffling feet as she tries to sit still on a stool during her marathon hair braiding experience.

Amber’s advice?

“You really have to go for it. You can’t hold back.  It has to be like a small child trying to imitate a sound. You just have to let it rip!”

Thanks again to scottlo for giving us this opportunity to guest host not just one, but two episodes of the LoDown.

Easy Link to this podcast.

You can listen to all of the Obruni Podcast episodes with the audio player below. Photos and scripts are also available.  Episodes referenced in part two of our conversation:

  • The “Antelope Man” (The Entertainer) in EP05- All’s Hair in Love and War
  • The “woman in blue pants” in EP04- Devil’s Hairground
  • Gulping of a Coke in EP01 – Obruni: Take it Up
  • Head hitting the pillow in EP02- Obruni Ko Skuul
  • Agitated shuffling feet in both EP01 and EP04
  • +  EP01- Obruni: Take It Up
  • +  EP02- Obruni Ko Skuul
  • +  EP03- Transportation
  • +  EP04- Devil's Hairground
  • +  EP05- All's Hair in Love and War

Reflecting on DS106

[soundcloud url=”http://api.soundcloud.com/tracks/96139137″ params=”” width=” 100%” height=”166″ iframe=”true” /]

Prompted by comments and discussions with scottlo, our DS106 audio mentor, I’ve taken the time to reflect upon and record my thoughts and impressions with the University Mary Washington open online course in digital story telling.

I find that the open, collaborative, and sometimes chaotic nature of the course allows for a tremendous amount of creativity to be unleashed, and I feel inspired by the quality of work put out there by the entire ds106 community.

There is something different going on here. We are learning from and teaching each other: Teacher to student, student to teacher, mentor to teacher, teacher to mentor, mentor to student.   Bringing our “A” game, which inspires others to do the same.  It’s not just happening in closed classrooms, but globally, across generations, synchronously and asynchronously.

[DS106ers can submit their own self-reflection here.]

 This is what the future of education can be.

DS106 Log0

UMW Open Online Course in Digital Storytelling

Note: The background music is a self-recorded version of “Can’t Find My Way Home”, written by Steve Winwood. (Often attributed to Eric Clapton.) I like the song, especially the way it sounds when I play it in on my 12-string guitar, but I don’t feel inspired by the original famous lines:

But I’m near the end and I just ain’t got the time
And I’m wasted and I can’t find my way home.

  My version, “Findin’ My Way Home”, changes the lyrics to something I can get behind and sing from my heart:

Near the end and I just ain’t got the time
To be wasted cause I’m findin’ my way home.

Low down on the LoDown 17

[soundcloud url=”http://api.soundcloud.com/tracks/95490369″ params=”” width=” 100%” height=”166″ iframe=”true” /]

[soundcloud url=”https://api.soundcloud.com/tracks/96080634″ width=”100%” height=”166″ iframe=”true” /]

construction,under-128Here’s a picture of what went on technically behind the scenes to create the LoDown Episode 17 and the LoDown Episode 23 podcasts.

1. Preparation

My daughter, Amber, and I talked about what we might like to do and what format to use. The interview format appealed to both of us. I jotted down some concepts and themes that I wanted to include in the interview and posted them to Google Docs. This way Amber and Scott could see what I was thinking and respond in an asynchronous way, when their schedules allowed it. The document was continually updated when any of us had additional ideas or comments.

We eventually came up with 8 interview questions which included notes with talking points and examples that we wanted to include in our responses. Putting the questions in an order that made sense and flowed well took some thinking and working. We weren’t creating a script, but we needed to know where we were going. We didn’t want this to be a rambling flow of consciousness thing. Amber also identified which sound effects she wanted to use, and where they could be found in the Obruni podcasts.

Our time together to record the interview was limited, and I needed to have everything finished and sent to Scott soon. So we needed to hit the ground running.

  • I had the studio set-up with chairs and two mics. (had to go out and buy a 2nd pop filter)
  • I re-familiarized myself with my audio mixer. As much as I could on my own, I balanced the sound levels for the two microphones. This gave me a chance to practice speaking, recording, and listening to what I sounded like. I noticed I was speaking too fast and needed to slow it down significantly. That took some practice. (Scott suggested I smile and relax.) Recognizing this before we started recording together, meant I could warn Amber and she could help me to remember to slow down.
  • I created a new file in GarageBand and gathered all of the zingers, bumpers, and sound effects that would be needed for the completed podcast. Fortunately, I didn’t need to go hunting on the internet or create any new sounds. I only had to locate them on my computer from past projects and place them in my new file. I optimized volume levels and aligned the timing of the intro & outro bumpers, and also went ahead and recorded my solo spoken intro and outro. (I’d already used up 4min of air time before the interview even started!) It took a couple of hours to find everything and set it up in GarageBand, so that “all I had to do” was to drop in the interview tracks.

2. The Actual Interview

LoNAmber_3

Rochelle and Amber making their podcasts

When Amber arrived at 6pm we still had work to do to get the interview questions and talking points to a place we were both comfortable. By 7pm we were almost ready to record. The sound check with both of us speaking went surprisingly smooth. The pre-work I’d done earlier paid off. We weren’t sure how this was going to work, but we were hoping we could do it in one take to keep the energy alive and spontaneous.

One take was all it took – except for when the dog came into the studio, whining, and we had to stop recording to take her back upstairs. Not only did we have to redo a quick section, but I started talking too fast, and we had to wait until I could relax and settle myself back down again.

When we finished the interview we had 30 minutes of material. Ooops! How’d that happen? Now what? It turned out that the way we had structured the interview questions there was a logical mid-point where we could split it into two parts. Fortunately they were both about 15 minutes long. We decided we had accidentally made two podcasts, and I’d only work up one of them now. [Link to 2nd half] We spot checked the quality of the recording instead of listening to the whole thing like we would usually do. Amber needed to get home. We were happy with what we heard and Amber was out the door by 8:30pm.

3. Post-Production

rockyLouProd

Using only the first half of the interview, I went to work editing (or proof reading) the sound file to take out mistakes and dialogue that weren’t really needed to tell the story. I also had to add in the sound effects. I know my way around GarageBand, and have produced several of the Obruni podcasts, so I was able to complete this phase in under 3 hours. This wouldn’t have been possible if I’d been working with the entire 30 minutes. You have to listen to it, and the whole thing mind you, a couple of times through to make sure you don’t miss something. Even though I’m thorough and pay attention, I continue to catch mistakes or spots I’d like to clean up a bit more when I turn it into an mp3. The third time was a charm.

4. Final Steps

      • Upload the file, which took a few failed attempts on SoundCloud before I just gave up and uploaded it VERY simply to google docs.
      • Write up the blog post for the LoDown with hyperlinks activated
      • Write my own blog entry on my process. (I worked on this alone for about 90 min.)

UPDATE Oct 7, 2013:

You can listen to all of the Obruni Podcast episodes.

  • +  EP01- Obruni: Take It Up
  • +  EP02- Obruni Ko Skuul
  • +  EP03- Transportation
  • +  EP04- Devil's Hairground
  • +  EP05- All's Hair in Love and War

Warholing a Rock ‘n’ Roll Stereo GIF

Warhol_It_GIF

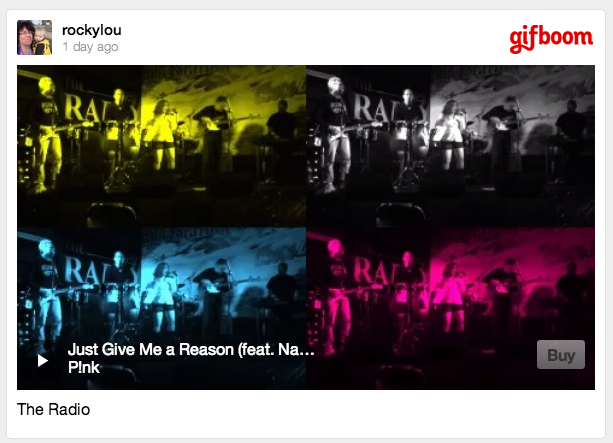
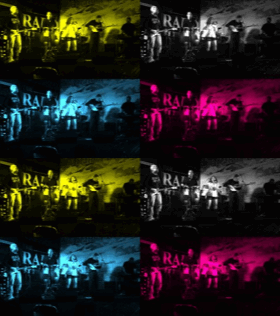
Warholing an animated stereo GIF of a rock band

Last night I was writing up my post for “Have a Rockin’ Birthday” with the usual addition of a nice tutorial to share with others since no one had posted one yet.  It slowly dawned on me how much work I actually put into completing one of my DS106 assignments.  I’m definitely puttin’ on my “A” game that ScottLo and “Prof.” Groom referred to in LoDown episode 15 today.  I want more stars!  [Imagine little Rockylou hands on hips, threatening to throw a tantrum.] I think the creative star accounting I’ve used for this particular assignment should help toward remedying the situation.  Especially since I spent practically no time creating this one.

1. I downloaded an App called GIFBoom to my iPhone (for free) that lets me take my own photos and turn them into a GIF.

2. I found two quick shots on my iPhone from a band gig I’d documented a few months back.

Rock ‘N’ Roll ‘N GIF AnimatedGIFAssignments851 (3 stars)

3. They worked great to show the stereo GIF effect.

Stereo GIF AnimatedGIFAssignments991 (1 star)

4. The App gave me several options to add an additional effect.  I chose the Warhol filter.

Warhol Something VisualAssignments560 (2 stars)

5. Ta Da! Assignment complete.  Blog post written.

Animated GIF

Animated, Rock ‘n’ Roll GIF Completed!

By my count that’s 6 stars!  What say you Prof. Groom?

Have a Rockin’ Birthday

I wanted to give my my son-in-law a special birthday card this week.  AnimatedGIFAssignments1086 was just the thing.

Make someone a special birthday card, but make it extra special by including a GIF!!  Try to make the design unique to them (it’s THEIR birthday, after all!).

Animated Birthday Card

‘Shakin’ It Up’ for a special birthday card

I’m starting to get good at this now with all the practicing I’m doing with my new GIFing skills.  I use Photoshop Elements 11 for the Mac as my image editing tool, and here’s my tutorial on the making of this GIF.

Original Birthday Card Image

Original Card

Step 1: For this project I started with an image I found on-line from a free create-your-own birthday card site.  I chose this image because it had a solid white background which makes it much easier when you get to the point of merging the layers.  And that was important because on this card I wanted to make the guy dance, but keep the text still.  I also wanted to add a little something extra to personalize it.
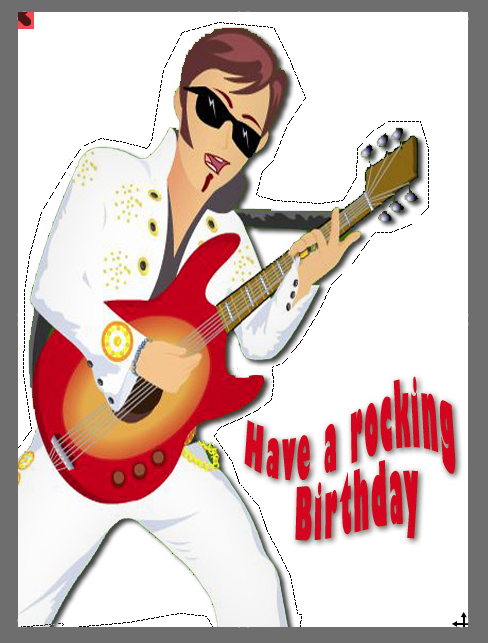
Lasso Tool Selection

Selecting Image with the Lasso Tool


Step 2: Use the lasso tool to capture only the guitar player as illustrated above.  Copy and paste it into a new layer with a transparent background.  Then grab the image of the “Have a rocking Birthday” text and do the same thing.  Then you’ll end up with two pieces of the image on two different layers, with transparent backgrounds.
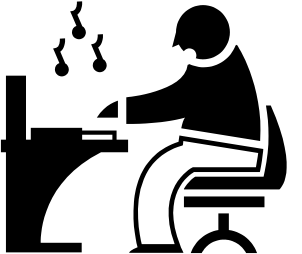
Making Music on the Computer

Step 3: To personalize the card create another layer with your text or a special image.  I used this free clipart icon of a man sitting at a computer making music as my son-in-law, Michael, has just taken up a new hobby learning how to create music on the computer.  I think he might be using Audacity even.

Guitar Player Images

Step 4: Create Guitar Player Image Layers

Step 4: Duplicate the guitar player to create three identical layers.  Rotate two of the images +5deg and -5deg.  You now have 3 guitar players, one leaning forward, one leaning back and one in the middle.

Step 5: For the border I made a rectangle with a transparent fill in PowerPoint (I know my way around the program very well, and it was just easier to do it there.) and saved it as a picture in the .PNG format.  This allows you to maintain the transparency of the images.  We’ll also need a solid white layer. You should end up with 7 unique layers at this point. But we’ll need to make duplicates of layers 4-7 below to be used during the layer merging process.

1. Guitar Player tilted backward (1)

2. Guitar Player in the center (1)

3. Guitar Player leaning forward (1)

4. “Have a Rockin’ Birthday” text (x3)

5. The computer guy icon (x3)

6. The border with a transparent middle (x3)

7. A solid white layer (x3)

Step 6:If you haven’t already, duplicate layers 4-7 so that you have 3 of each as noted above.

Step 7: Now it’s time to start merging the layers together so that you end up with only the guitar player moving and everything else remaining still.  These new merged layers are what will be used to create the actually GIF. Make sure you save your work often and I’d highly recommend saving the work you’ve done creating the individual image layers as its own file at this point – just in case you make an error during the merge process, you have something to go back to.  You really don’t want to start all over again do you?

Note: The white layer should go at the bottom of your stack.  It is supposed to be the background.  Otherwise when you merge the layers you’ll end up with only a white image.

Rockin B-day Final Image

Final merged image

Merged Layer 1: Guitar player tilted back =  1 + 4 + 5 + 6 + 7

Merged Layer 2: Guitar player in center =  2 + 4 + 5 + 6 + 7

Merged Layer 3: Guitar player leaning forward =  3 + 4 + 5 + 6 + 7

Duplicate merged layer 2 (the guitar player in the center) so he’ll rock forward and backward evenly. Ta Da!  You now have the four layers you’ll need to create your GIF.  Center => Forward => Center => Backward. If you’ve done it right you’ll only see the guitar player rockin’.

Step 8: In PhotoShop Elements 11 you select “Save For Web” to preview your GIF. On the right hand side menu, select GIF, Transparency, Animate, and set your speed in the “Frame Delay” box at the bottom. The default delay of 0.2 seconds works for most projects. Click on preview over at the bottom left and you can watch your masterpiece in action.
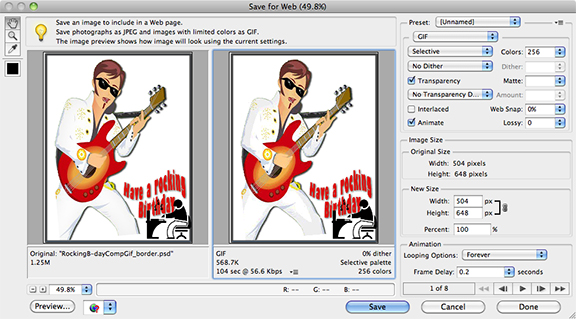
SaveForWebWindow_8in

Step 9:  If you like what you’ve done, save it as a GIF.  To view the file once it’s on your computer you’ll need to open it with your browser.  On my Mac I right click the file, select ‘Open With’ Google Chrome.
Bumping The LoDown

What better way to show my appreciation than create a series of radio show bumpers for my teacher.

Scott Lo hosting the LoDown for DS106 this summer

+

AudioAssignments36 to create a DS106 Radio Bumper

+

HAPPY STUDENT improving her audio storytelling skills

=

5 different LoDown bumpers for Scott to use freely on his radio show and blog posts

What is a bumper? It is a short recording that identifies the radio station with signature music or an expression that makes sure the listeners know what they are tuned into.

Lo DownThere’s no mistaking that you know where you are and where you’re tuned into with this set of bumpers.  I used as my foundation a single voice track that I recorded while in the grocery store parking lot with a new iPhone app, Recordium, that I downloaded yesterday at the recommendation of Scott on LoDown episode 12.  Then the real fun began …….

I’ve been experimenting lately with how a soundtrack can drastically change the mood of the media project I’m working with. A few months back I was creating a photo slideshow for a friend, and it was amazing how the flow of images, and our decision to add title text or not, was altered by the choice of music.  I’m able to illustrate that effect at some level with this set of bumpers.  The spoken audio remains the same, just new music underneath.

I had plans to really show this effect by adding a soundtrack that was silly or comedic. But sadly, couldn’t find an audio file in my stock list of jingles and stingers in GarageBand that fit the bill.  I’m still giggling though at finding the Medal Ceremony (LoDown3) and Broadcast News (LoDown 5) clips.  I hope Scott will be just as amused and want to use them for DS106 Audio Week. 😉 I’d highly recommend anyone who hasn’t worked with soundtracks to try something like this.  You gain a whole new understanding and appreciation for the emotional power of sound.

One last note: I’m sure most of us have run up against the powers that be and have had issues with YouTube or Facebook taking down our videos (or highjacking them by adding product advertisements – grrrrr)  because of Copyright Infringement.  My way of addressing this from the beginning is to use the Vimeo Music Store to locate tracks I can use legally without question. You can even create custom tracks that perfectly fit your videos.  It’s a great resource and there is a lot there. There are free creative commons, $1.99 personal use licenses, and $20+ commercial use licenses available.   I’ll test a tracks suitability and mood by having two windows open on my computer, one playing the slideshow the other playing the music file on Vimeo.  Then when I find something I like, I pay the $1.99 just like on iTunes, and download it. Check it out.

[Other Radio Bumper projects I’ve completed: Obruni Podcasts, Mashing for DS106 Radio)]


Mashing a DS106 Radio Bumper

Thanks to my fellow DS106 students who made sure they clicked on the “Allow Downloads” button in SoundCloud, I was able to mash this DS106 Radio bumper.  It’s short and sweet, just like this post. AudioAssignments36

Big kudos to my unsuspecting contributors….

Dylan Gott – Brooke Parker –  Kristen Lamb – Jennifer  – Rapt’nRent

ds106.ioAnimatedNewOldFriend_290

Podcast Bumpers for Obruni Series

For an earlier audio assignment to create a 90sec story out of at least 5 sound effects, I used sound effects that I already had on hand from a series of podcasts I am producing with my daughter, Amber. As before, I’m again making a slight tweak on the formal assignment description for DS106 Audio Assignment 36, “Create A Ds106 Radio Bumper”.

What is a bumper? It is a short recording that identifies the radio station with signature music or an expression that makes sure the listeners know what they are tuned into.

It’s still a bumper, but for a podcast, not DS106 Radio. There are three different audio files posted in the series.

Track 1: “Intro Music RLProductions” is used like an abbreviation or I what I like referring to as an Audio Icon for anything associated with Rockylou Productions. I’ll digress just a minute hear to say that I know I’m mentioning Rockylou Productions  often in my posts. I’m not trying to promote myself, this just happens to be my personal playground of creativity where I spend much of my free time, and I have material I can easily pull from to complete the assignments in a more compressed time frame.  I then have time to create tutorials for the assignments that can help others.

Back to your regularly scheduled program…….

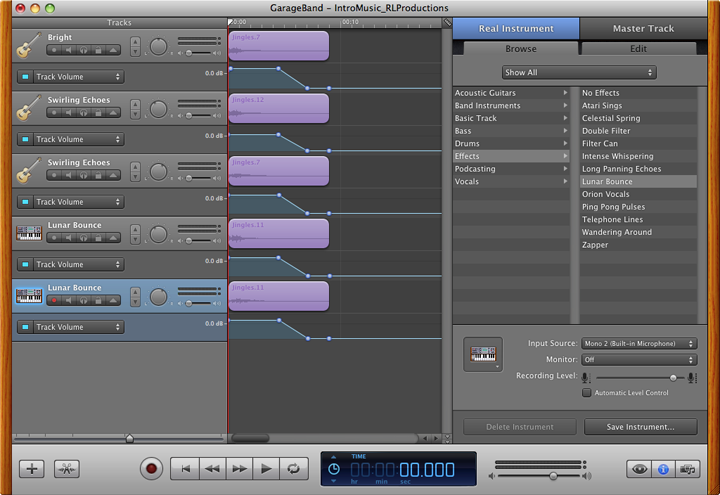
The Audio Icon is used at the beginning as part of the intro and at the very end.  We also use this chord as part of the final credit sequence for some of our videos. It was made by recording myself playing a simple “D” chord on my 12 string guitar.  Then I used GarageBand to layer 5 different tracks by playing around with different effects. It was a fun morning putting that together.  I just kept trying this or that, until I stumbled across a combination that I felt was memorable.

GarageBand screen shot of the layered tracks for  the Rockylou Productions "Audio Logo".

GarageBand screen shot of the layered tracks for the Rockylou Productions “Audio Logo”.

Track 2: “Obruni Bumper Start” is an example of the template and style we use for our intro.  The chord plays to let you know that you’ve arrived.  Then I welcome the listener and give a short introduction of the podcast they are about to hear.  We want this to be short, but descriptive enough to grab the listener’s attention and they’ll want to keep on listening.

Track 3: “Obruni Bumper End” is an example from another podcast in the series, “Transportation”. But the format is always the same.  At the end of the spoken text of the story I increase the volume of the soundtrack that we have associated with the Obruni podcasts.(See note.) I then fade in the the audio credits – like who it was written by, an attribution for the soundtrack music, and anything else that may be needed. At the very end you hear the familiar Rockylou Productions chord strum that lets the listener know we have now “left the building”.

Note: I had to track down the publishers to obtain written permission to use the Fanti music, Apatampe, so that I wouldn’t infringe on copyright issues.  It took some digging, but I finally found the publishers and they were very nice about it.  As long as I included an attribution and I didn’t use it for commercial purposes, it was fine to use for my projects.