Category Archives: Assignments

It’s Showtime!

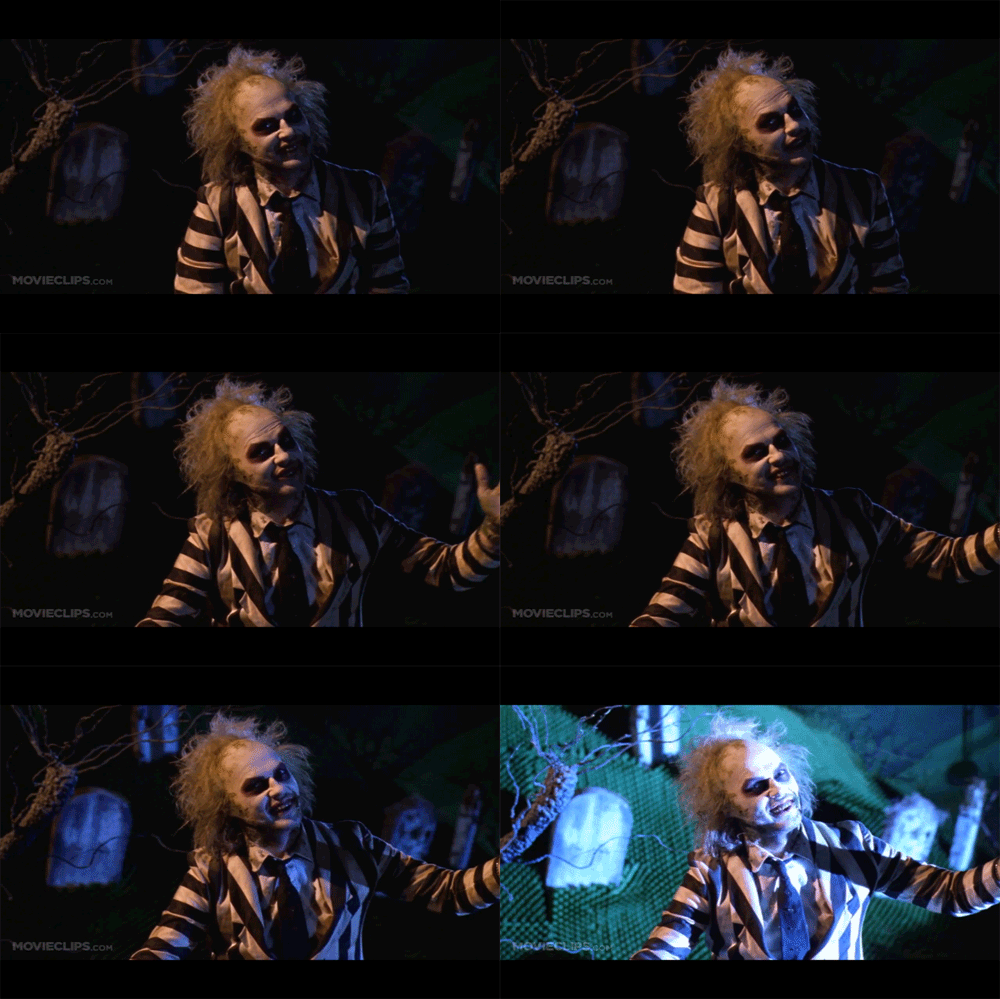
BeetleJuiceGIF_2

“It’s Showtime!”

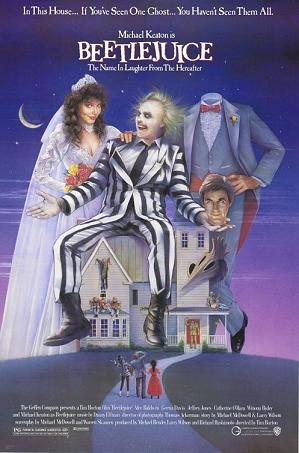
One of my favorite movies of all time and characters is Michael Keaton as Beetlejuice.  The ghostest with the mostest.  This 1988 comedy horror film directed by Tim Burton is a scream and I’ve always thought quite romantic too.  [Wikipedia Post]

And look at that… the official movie poster? Yes.  There are indeed headless ghosts running around from time to time.  But none of those scenes seemed as appropriate to sum up the movie and capture the essence of a key scene as when Beetlejuice, a self-proclaimed “bio-exorcist”, is being released from his exile in a small model town in the young couples attic. Indeed… It’s Showtime!

Talk about perfect source material for completing the DS106 Headless 13 week two assignment, Visual Assignment 2 “Say It Like The Peanut Butter”  Make an animated gif from your favorite/least favorite movie capturing the essence of a key scene. 

This is not my first movie GIF, [See Ewww… Brain] so I’m pretty familiar with my GIF making tools now.  I’m also getting better and better at choosing the right kind of source material to work with to make things go smoother and faster in the production process.

For the video clip I knew this was a key scene and someone on YouTube would have posted this small segment and I wouldn’t have to search through my own DVD to find it.  Yep… there it was, and even better… It was an HD version to boot.  I downloaded the clip to my Mac with the DownloadHelper extension in Firefox.  I then imported it to Adobe Premiere Elements 11, located the 3 second clip and then exported it as a JPEG sequence at 10 Frames per second.

Publish+Share => Computer => Image (use for exporting still image) => open the advanced menu and choose “export as sequence” under the video heading, then save.

I opened the 36 images in Adobe Photoshop Elements 11 and placed them all into one file as separate layers.  The original images were quite large, so I reduced the image size to 500px which is the upper limit to post to Tumblr.

File => Save For Web => Click on Animate => Animation Frame Delay set at 0.1 => Save

That’s it.  Simple once you know how to do it.  Not so the first few times as I was learning how. [See Hula Hotseat]  For those of you just starting out…. hang in there.  It gets easier the more you practice.  [See Batman & Robin Behind The Scenes for a good photoshop elements GIF tutorial]

And a whole lot more fun is coming your way!  Soon YOU’LL be saying, “It’s Showtime!”

Video Source: MOVIECLIPS.com

Star Spangled… WHAT?!

Star Spangled What?! video link

Today’s DS106 Daily Create tdc597 was to “edit an existing video clip to include an unexpected object in the story.”

StarSpangled_WHATVideo is my “thing”.  Not so the case for many of the DS106ers.  And I didn’t realize until I read a couple of comments in the DS106 Google + community today that some of you have felt intimidated to try your hand at the animated GIFs and videos from previous daily creates once you’d seen submitted projects.  A tip for maximizing the value from this course? Don’t compare your art contributions to anyone else’s.  Do what works for you. Do what you enjoy. Don’t worry about your level of expertise with the tools.  We are all beginners in some areas and there are those with more experience we can learn from. The DS106 community is a supportive group of individuals who hold a space and offer encouragement for us to take risks and move outside of our comfort zone.  It’s okay to be vulnerable here.
For me today that took the form of not pulling myself back.  But I also decided to take on the challenge of seeing how quickly I could produce the video.  (I really need to get some sleep tonight. Too many late nights working on DS106 stuff!)

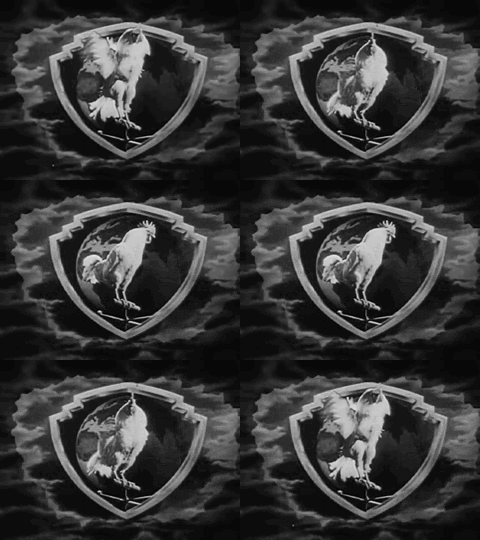
chicken_2

B&W Chicken GIF  courtesy of John Johnston

My first creative inspiration was to use John Johnston’s chicken GIFs: Red ‘Chicken Talking  and his B&W Chicken (He would be considered one of our ds106 experts in the GIF arena.) Based on my personal experience this summer with a previous project [Talky Tina – Sweet as Tupelo Honey] I knew if I used the original GIF files in my Adobe Premiere Elements 11 video editor, I’d have to string together multiple copies of the still images to have continuous movement over several seconds. This would not be conducive to going to bed early.  Ding! I could use my screen capture software, Camtasia, to actually capture the GIF in action over several seconds. It would already be in video format and could easily be inserted into any video I wanted.

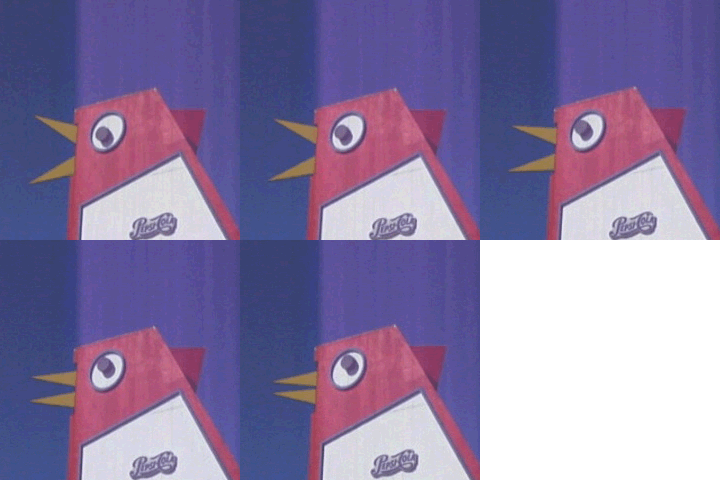
chick-01

Chicken Talking  from John Johnston

Next, I started looking at YouTube videos made by other DS106ers.  I downloaded a few of them to my computer with the Firefox Video DownloadHelper extension. Nothing was working.  I then remembered an earlier daily create of my own, Speedy Star Spangled Banner.  I thought it would be really funny to have John’s  red ‘Chicken Talking’ GIF  do the singing, but it took me a little trial and error to make a “logical” substitution of the B&W GIF.

My video editing software allows me to have several layers, and all I had to do was to put the video versions of the GIFs onto a layer above my original video. I then spliced out a segment at the beginning that referred to the previous daily create, added a video title image that comes with the program, personalized the text, rendered the video, and published it to YouTube.

In John’s podcast today, Evidently Not ChickenTown, he talked about how we can have a flurry of ideas after seeing other DS106 projects.  Here’s proof.

Original Video:

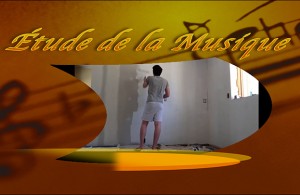
Etude de la Musique

A study of music….

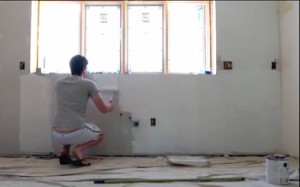
Music is a powerful force that can change the mood and even the meaning of a video. I’ve been wanting to illustrate this concept for awhile and when I saw the tweet and original video created by Brian Bennett I knew this was my opportunity.  Because of the video’s simplicity with one on-going activity (Brian painting a room) as the viewer moves through different styles of music one can feel the effects of each piece as it relates to how the video is experienced emotionally.

Watch & listen to the original video by Brian Bennett & read his blog post here.

Painting_Music_Title

“A Study of Music” illustrating the power of audio.

Brian  and I talked about the power of music and we both thought there was/should be a ds106 audio assignment that did this, but we didn’t find one.  I tweeted Brian (@bennettscience) that I had wanted do this sort of video and put up an assignment, but didn’t have a good illustrative video to use as an example yet.  I asked if he’d mind me using his.  It was no problem. Now one of us just needs to write up and submit the assignment.[UPDATE: AudioAssignments1193 has been created and ready for you to try.]

This music video was very simple to make. I knew that I wanted a variety of music styles: soundeffectish, comedic, dramatic, simple, complex, ect.  Figuring out how to search on the freemusicarchive.org site took a little time, since this was only my second time visiting.  But once I had my key words down I was able to locate about 15 songs that I thought might work and downloaded them.  I was able to keep track of the artists names and songs for later attribution from their file names.  That was a nice bonus, as properly siting my sources can be a real headache and time hog as I try to rekindle my search logic when I found them the first time around.  HINT: To keep track of sources pulled from the internet, create a new post, keep it in draft mode, and copy & paste all of your links with a summary of what they are into the awaiting post.  When it comes time to write up your post you already have a big chunk completed, and no retracing your steps.

Painting_Music_WindowInside

B. Bennett painting room time lapse video

Once I had the songs it was a matter of placing them onto the timeline and seeing what fit where. (I used Adobe Premiere 11 as my video editing software.)  Making effective transitions between the pieces of video and music are important so that the viewer is not distracted or irritated, but instead able to easily go with the flow.  Fortunately, I didn’t have to resort to my first plans of chopping into the video and adding fade to black transitions with each change of music. As I worked with the media I noticed there were natural transition points that I could use instead.  That made it an even more powerful illustration because there was a continuos visual flow.

Having Brian’s original music, My One True Love by Ben Saretan remaining at the beginning, middle, and end of the video was important to me. As with many of my projects, I continue to be amazed at how things can miraculously fall into place.  And that was certainly the case here as I noticed and worked with the natural transitions. Brian’s music remained in the locations I had intended and the music selections on either side “made sense”.  There is a nice flow both from a visual and auditory perspective.

Did you experience the video segments differently as I had intended? What emotions did they bring up? Which music selection(s) did you enjoy more? [Start time links provided below.] Did you feel that one song was more suited to Brian’s video throughout? Why? I’d be very interested to hear your reactions and comments to the piece.

All music licensed under Creative Commons from freemusicarchive.org

Painting_TitleCardIntro

Monster In The Kitchen

IMG_1342

DS106 tdc595 “Monster In The Kitchen”

DS106 Daily Create tdc595 was to “Build a monster out of items in your kitchen.”  I tried a few things on my countertop with a teapot, an over-ripe banana, a recipe book holder, a cup tree, some tongs, knives, beaters, a cork screw, and a tea tin, among other various items. But my attempted kitchen Frankenstiens were too complicated and seemed forced.

I was also thinking about turning the photo into a stop-motion build of the monster or a GIF with moving parts.  So I needed it to be simpler to get photos in a sequence that had a minimum of camera movement. In the end the GIF idea faded away in exchange for taking the time instead to write this blog post.

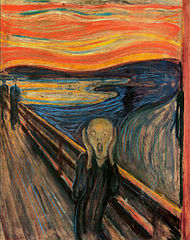
The_Scream

The Scream by Edvard Munch

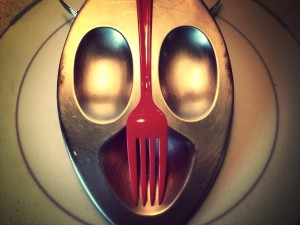
Since nothing was working I decided to start over from scratch.  What else could I use? Where else could I build it? By moving to the range top I noticed my spoon holder looked like The Scream by Edvard Munch. Now that was something I could work with.

The simplicity of my new monster was appealing. The corkscrew placed underneath was at first supposed to be ears or arms. It eventually became horns. Then I wanted to add a splash of color and found a red plastic fork that doubled as a nose and sharp teeth.  Ta Da! My monster was born.  Now to capture it on “film”.

IMG_1334

Monster looking down

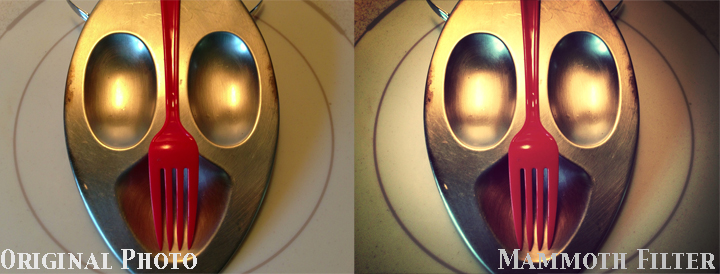
The photos were taken with my iPhone in the Camera+ app and then I applied a filter called Mammoth. As I was taking the shots I noticed the monster’s eyes changed from angle to angle. And tried to capture several angles to work with. Here it is looking down.


The final image with a large straight-on stare looked the most monster like. The application of the mammoth filter made the eyes bigger, provided the vignette shading around the outside, and a tinge more dark silver tone. It reminded me of something you’d see in a horror movie.

FilterComparison

Final kitchen monster image with the addition of the Camera+ Mammoth filter

Chomp Chomp The GIF Fight

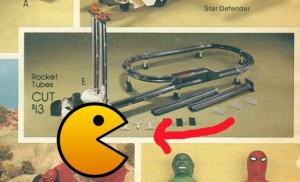
PacMan_400

As I become more and more experienced with any of the digital media platforms we play with here in DS106, my thought process for how I choose and go about creating matures. Let me walk you through how this one went.

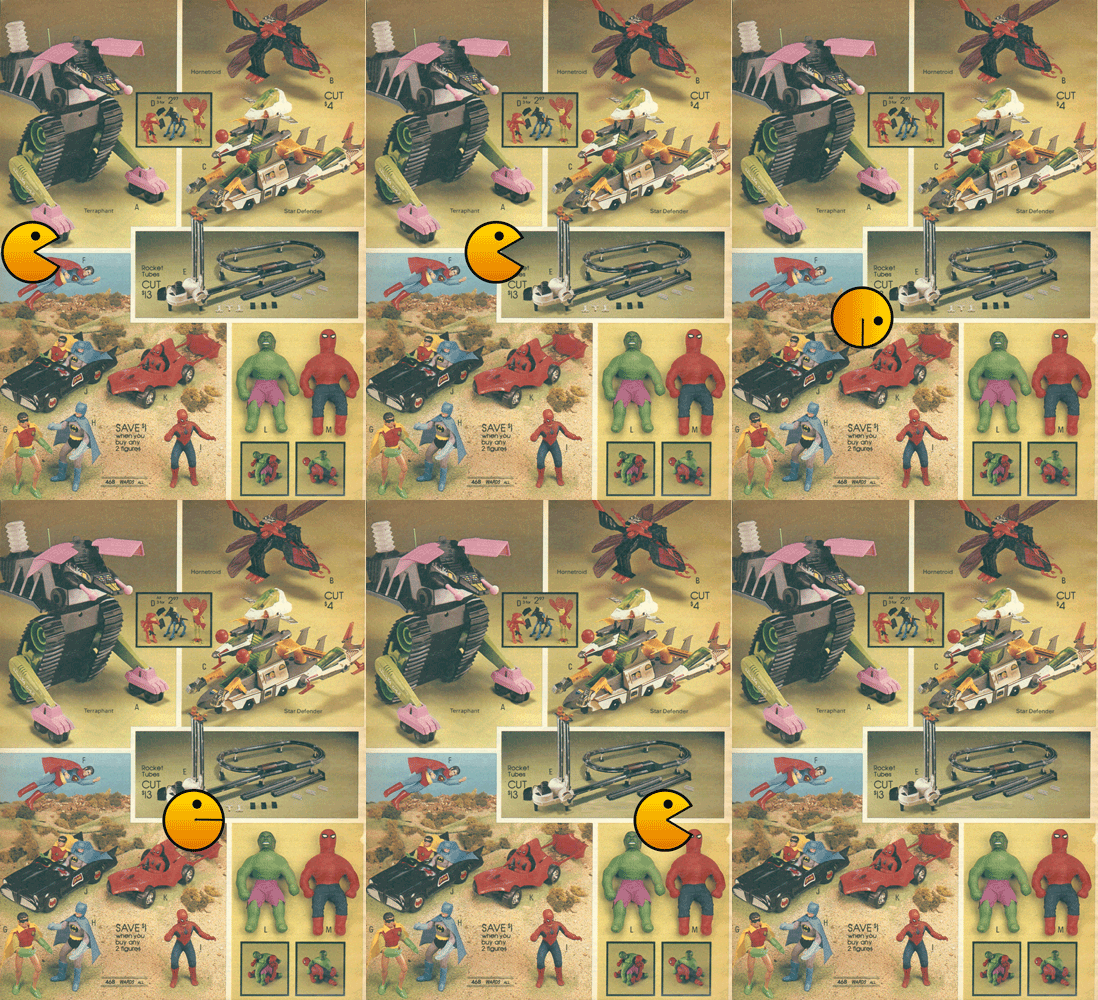
I read the tweet announcing the new #GIFFight challenge photo had been posted at about 9:30pm.

I was seriously considering going to bed early. But now my mind started thinking about what in the photo I could animate. That was it. I was sucked in. But I really did want to get to bed at a decent hour. So… it went something like this.

Run! Run! I forgot my meds again!

Run! Run! I forgot my meds again!

Hmmm… I could animate Superman flying across the page… Yeah, that might work…. Or I could add the ‘Batman & Robin Run Away From $#!%’ GIF to up top under one of the monster guys. Nah… would probably make the GIF too big. Tumblr only gives you 1Mb and 500px to work with. Let’s see. Oh, how about incorporating the headless theme? I could have Pac-Man come in and eat Batman and Robin’s heads off. Nah… I’d have to rebuild background. Hey.. That Pac-Man concept is good. I think Pac-Man is an 80’s thing too. Yep. Trusty ol’ Wikipedia confirms it. First introduced into the US in Oct. 1980.

1024px-Pacman_HD

Public Domain Image

Let’s find a usable, non-copyrighted image with a Google search. Drat, all of these are copyrighted or unknown licenses. Wait, here’s a simple-looking one. And what luck. It’s a CC Public Domain licensed wikimages.


PacMan_Lines

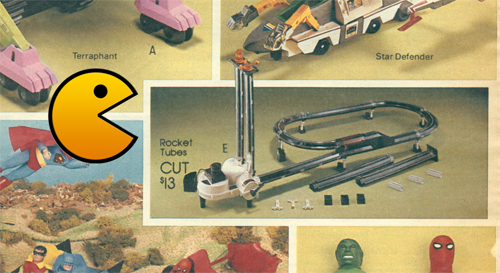
Pac-Man can move along the white lines, looking like original game.

Now that I have my image, how shall I move the little guy across the page. Hey wait a second, there are white dividing lines between the images, sort of like the video game. Yeah… I can make him move along the lines.


PacMan_Only

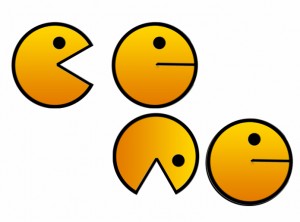
Pac-Man open, closed & change directions

Oh, but I’ll need to have his mouth open and close. Let’s do some copying, pasting and a little band-aid work to create a Pac-Man with a closed mouth.

Great I have all of the pieces. Let’s start him moving along the line. No that’s not right. He is moving too far from frame to frame. That’s better when they are closer. Hmmm.. he has to turn the corner, I need to duplicate my two pacman layers and rotate them 90deg clockwise. Chomp, chomp, chomp. He finishes his way out of the GIF.

PacMan_Pellets

Pac-Man can eat the pellets

Let’s take a look at it. Yep. That looks right. Hey wait…. There are little pieces as he’s heading out of the frame that look like the pellets that Pac-Man eats. Oh… I have to do something with that.  Another round of copying, pasting, resizing of a layer to cover the objects as he passes by. Now this is lucky… Because of the way I have Pa-cMan moving across the screen and his size, I won’t have to make the pellets disappear gradually. They can all be eaten in one pass as Pac-Man chomps by. Now we’ll post to Tumblr. Tweet out #GIFFight completed.

Oh that’s really ni…. wait a minute, hold the Tweets.  The shadow by the pellets is partially obscured by the new layer covering them up. Drat. I want to fix that. Let’s see if Tumblr will let you replace a photo without having to change the post link. YES! I can delete the old one and add a new one in its place and no one needs to know about the mistake at this point. Go back into Photoshop. Erase a bit of the new cover layer so that the entire shadow is visible. Save as a GIF remembering to bring it down to 500px. Open Tumblr post, delete old version and replace with new version.

Ta Da!

DJ B-day Dance Photostrip GIF

DJDanceGIF_Strip_2

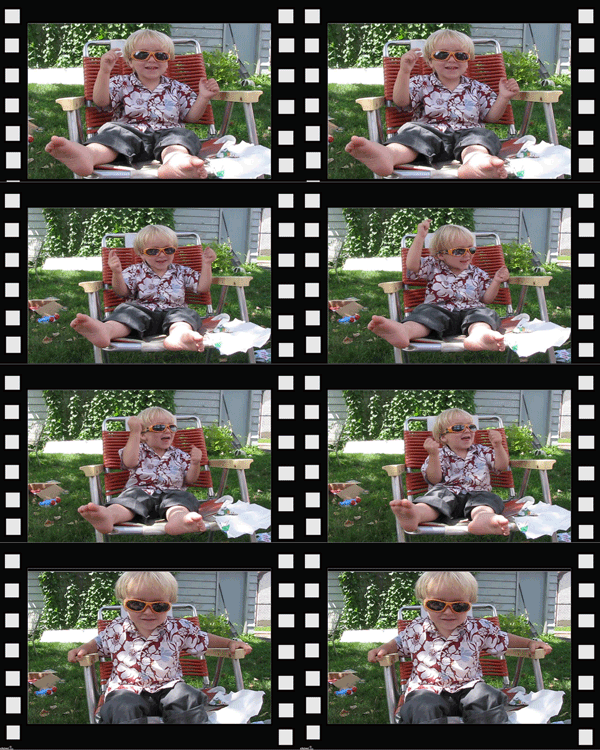
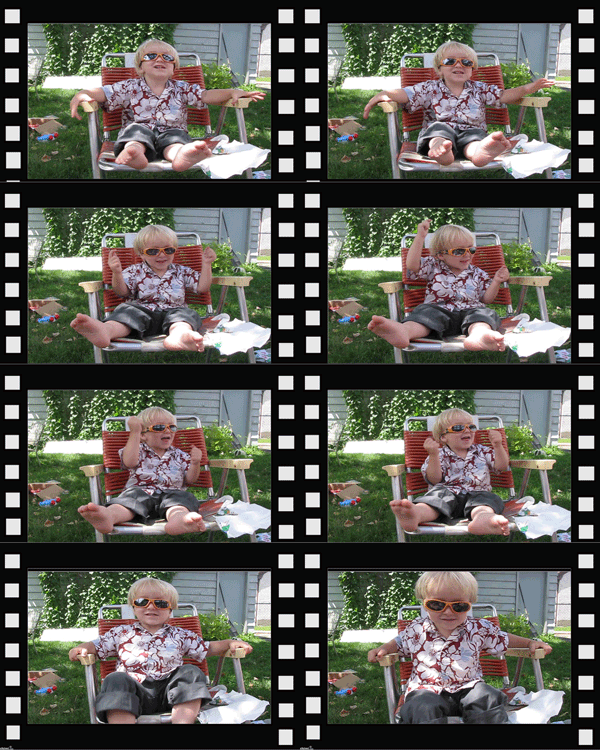
The DJ Birthday Dance Fim/GIF Photostrip

You know how you can take those quick burst photo strips at the mall or the fair? Wouldn’t it be cool if you could bring it to life with a GIF? That was my inspiration for making this Film/GIF Strip extracted from a short video clip taken on my grandson’s 2nd birthday this past weekend. [See his birthday cake here]

HOW IT WAS MADE

DJGIFDance

DJ Birthday Dance Still

I first downloaded the 9 second video clip my daughter sent into Adobe Premiere Elements, where I promptly exported it as an image sequence choosing 10 frames per second as my download. This significantly reduces the number of JPEGs produced. [Read how here]  I choose the images I wanted to use to make 4 different GIFs. Then I downloaded a free to use film strip image from Imikimi to use as my border.

With a little trick I learned yesterday, I duplicated the layers from each potential GIF and when the dialog box comes up, lo-and-behold, it asks me where I’d like to duplicate them to.  Of course it defaults to the file you are in at the moment, but by changing that drop down selection to my working consolidated file, I can easily move them without much of a bother. (Unlike what I’ve been trudging through on previous projects.)

Once all of the images were aligned onto one strip, using the full version of Photoshop , (each GIF having its own location) I created two animation frames and set them to 0.2 seconds.  There is no need for merging of the layers like when I’m using Photoshop Elements. THANK GOODNESS! My first attempt with all four GIF frames moving didn’t appeal to me.  [See below] It felt just too busy. I also wasn’t real pleased with the first GIF in the series. After some trial and error I decided I liked the look of the film/GIF strip with Photo A and D remaining stationary, while the two center GIFs of DJ really dancing continued to move.

DJDanceGIF_Strip_4

All frames moving are too busy for this Film/GIF strip

I’m now contemplating how I could turn one of these into a 3D Stereo Wigglegram GIF like Rockin’ The Rocks in 3D. The background is basically still with mostly DJ moving.  I think that means I can extract DJ from each photo and keep a single background image without needing to do much work rebuilding the chair.  Hmmmm……

Polar RIFF-A-GIF


jim_groom_dance_Freezer

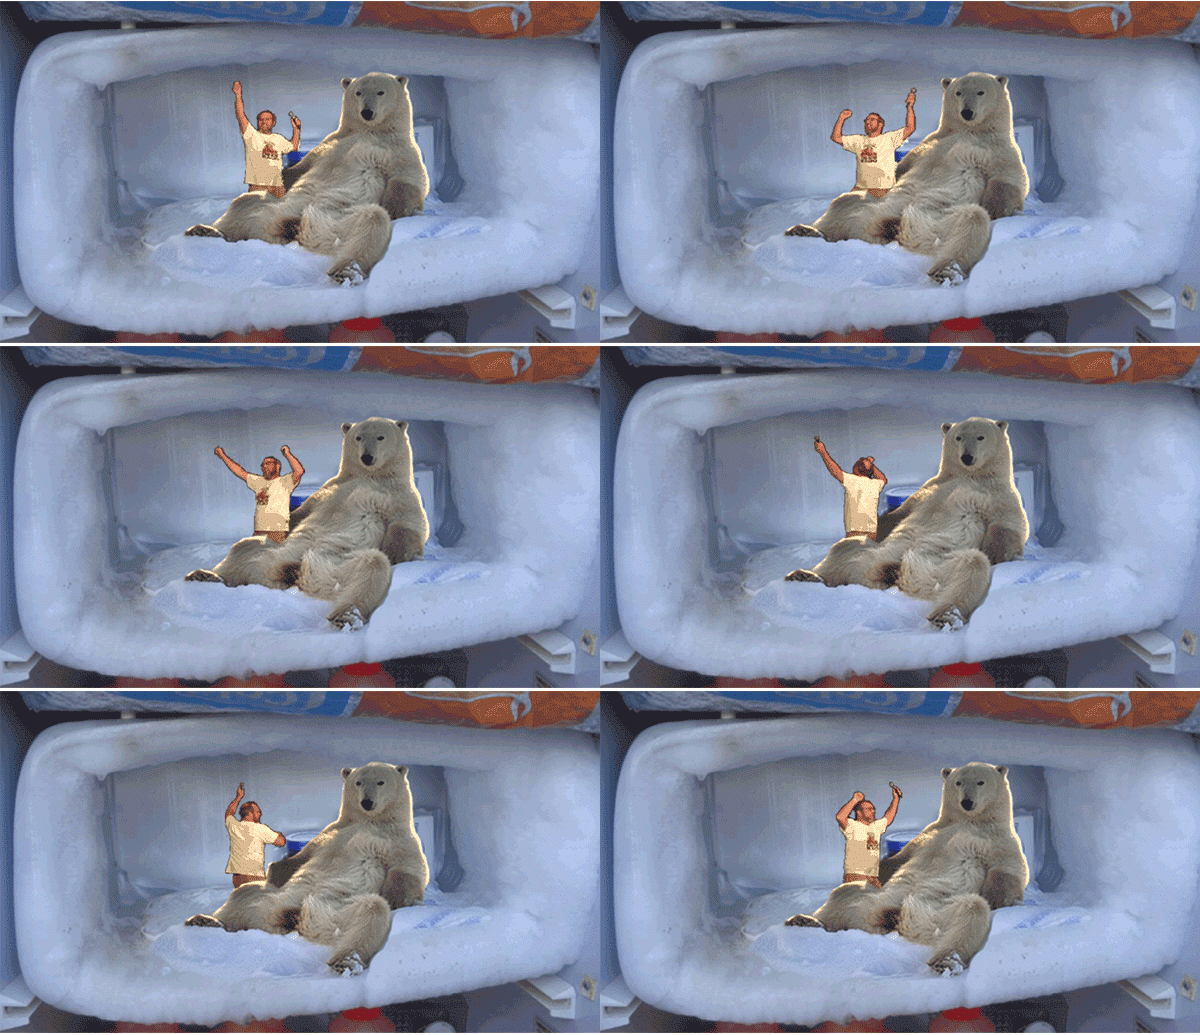
DS106′ Jim Groom doing the Polar Bear Polka in Viv’s Freezer

Some of the best parts of ds106 happens when people spontaneously build off of the whacky things others share. Rapid fire style. Your assignment is to riff on someone else’s ds106 work and make it new in a GIF form. It can be revising an existing GIF, or taking a graphic and turning it into a GIF. [ Animated GIF Assignment 859 ]

Where in the world is Jim Groom? He’s moved from Christina’s refrigerator
http://ds-ina.tumblr.com/post/57311409496/groominmyfridge
to Viv’s freezer. http://flic.kr/p/eSZKx7

Talk about reduce-reuse-recycle.  I get a three-for-1 on a GIF I made for fun some days ago.

  1. Talky Tina’s August 2013 GIF Challenge #13: RIFF-a-GIF 
  2. DS106 RIFF A GIF Animated GIF Assignment 859
  3. Dancing Jim All Over The World: Animated GIF Assignment 1001

Notice how Jim is nestled in the polar bear’s arm? By wisely choosing my original photo there was no need for rebuilding a part of the image.  It was a simple wave of the magic wand tool over the polar bears leg in Photoshop Elements. Then the new layer was placed in front of dancing Jim.

jim_groom_dance_RLL

Dancing Jim Groom. Right click to download & open as layers in photo editor.

Get Ready to Tumbl! The #GIFFight is on.

Vader_DS106_GroomJoinAlliance_2

“DS106 Joins the Rebel Alliance” and the Tumblr #GIFFight by @Rockylou22

DS106 joined in the Tumblr GIF Fight (#GIFFight) this week.  Our subject?… to GIF-ify Darth Vader. A few of us (who I knew about) stepped right up when the tweet from @mbransons came across our screens.

And now Talky Tina has posted August 2013 GIF Challenge #12: You Ain’t My Father, Bub! GIF Fight! [ Animated GIF Assignment 1190]

I had so much fun making Groom Outta This World With Joy, followed by his surfing the DS106 space shuttle in celebration of joining the “rebel alliance”, that I couldn’t help making another, and then another. Since I’ve moved over to the full version of Photoshop I can do so much more. (I apologize for the slight background image bump on animation frame #3.  I tried to fix it, but finally gave up.)

GIF #1: DS106 Joins The Rebel Alliance

There are three moving animations In this GIF. A feat too time consuming and technically difficult to have produced with Photoshop Elements. All those merging of layers just to get an idea of what I had would’ve been a nightmare.  [See earlier post: Groom – Outta This World] In the full version I can maintain all layers and view work in progress by simply selecting and deselecting layers for each animation image. The bouncing globe only required a capture of Vader’s front fingers to be placed as a layer over the globe when in the palm of his hand. What was tricky here was getting Dancing Groom and the DS106 Space Shuttle to align properly as they moved across the screen. Timing, spacing, positioning, etc. But again, through the wonders of really nice (and unfortunately expensive) software it wasn’t a chore – just a little fiddling around.

GIF #2: What Really Happened to Humpty Dumpty

I’ve been downloading images from Microsoft Clip Art lately and would often see animated GIFs that I thought would be fun to use in projects.  But I couldn’t get them to load into Photoshop as layers because the files are what’s called Indexed color mode and they need to be in RGB.  You’ll never believe how easily I got around this technical difficulty. (After a bit of trial and error though.)

  1. Open the GIF in GIMP 2.8 as layers

    Humpty_Dumpty_Transparent

    Humpty Dumpty GIF

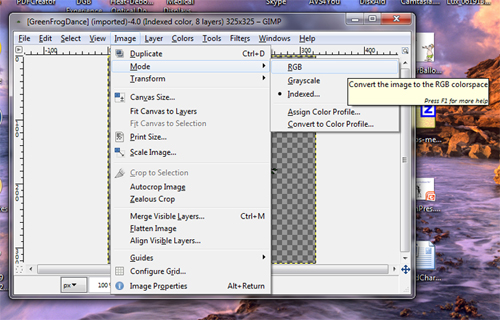
  2. Image=>Mode=>RGB (See screen shot below)
  3. File=>Export
  4. Select file type as Photoshop image (*psd).
  5. Click Export
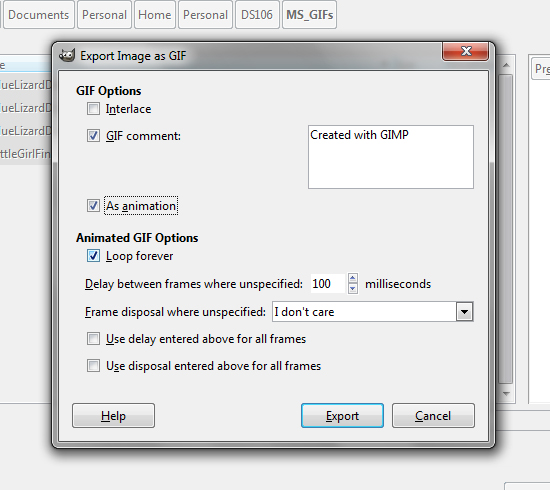
  6. Select “As Animation” in dialog box (see screen shot below)
  7. Click Export
  8. Open with Photoshop.  All layers will be visible.


ConvertToRGB

Converting a GIF from Indexed to RGB in GIMP

SelectAnimlayers

Export RGB GIF as animation : GIMP screenshot

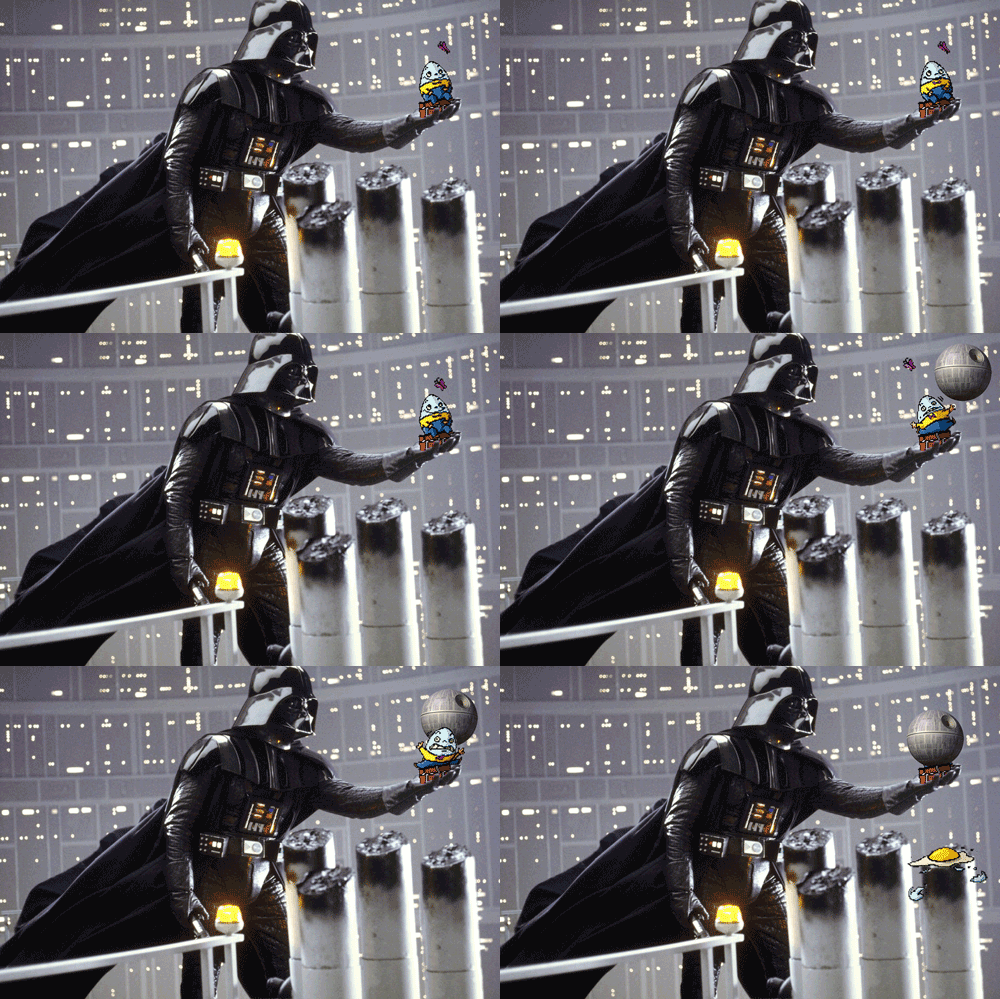
Poor little Humpty Dumpty.   He was lulled into a false sense of security watching a sweet little butterfly. Then WHAMMO! The Death Star zooms in and knocks him off his wall.

By hacking into the image layers of the original GIF I…

  • Made the wall shorter.
  • Extracted Humpty from each layer to have more control over how he moved in the scene.
  • Extracted the butterfly to get two separate image layers: wings open, wings closed, to create the illusion of flying away.
  • Put the egg into its own layer. (Which ended up being used in GIF#3.)
  • By lassoing the last pillar and pasting it into a new layer I had a place where the egg could splat.
Vader_Humpty

GIF#2: What Really Happened to Humpty Dumpty by @Rockylou22

GIF #3: Oh Crap! Run, Run

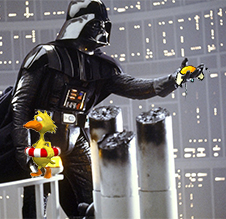
Vader_duck_2

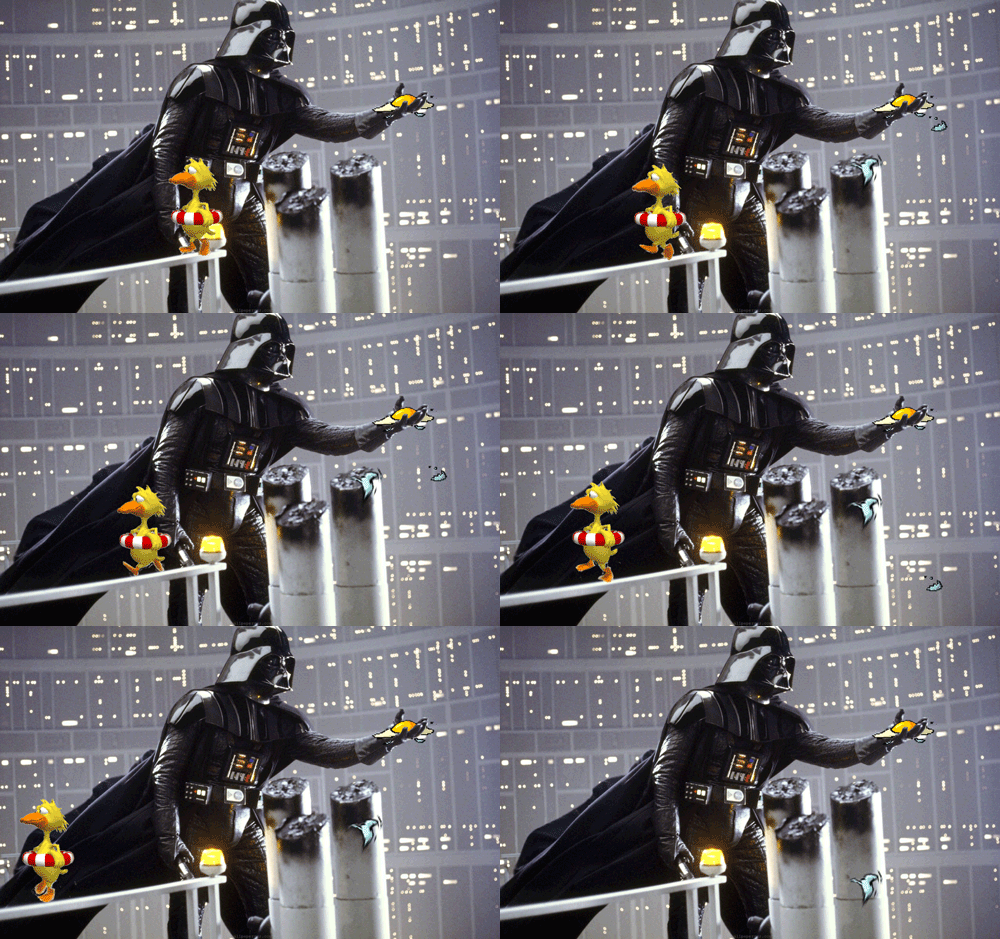
“Oh Crap! Run, Run” Tumblr #GIFFight submission by @Rockylou22

Number three in my Vader series stars a little ducky Duck_Lifesaver_Transparentescaping the wrath of Darth after laying an egg in his hand. I took the egg from the Humpty GIF and placed it in Vader’s hand. I used the same fingers layer I had used in GIF#1 to make it look like Darth was actually holding the egg in the palm of his hand.

Besides getting my duck to run across the railing, the splatter of egg onto the post and slowly sliding down took some creative effort. Thanks to a video tutorial by Michael Branson Smith, I learned how to distort an image by using the transform layer command.  Talky Tina had used this effect in her Flower Power GIF to make the flowers mold around the top of her Drill Sgt hat. I had been wondering how this was accomplished.

Select image layer => Edit => Transform => Warp => adjust handles till it looks right

Vader_duck_WarpEgg

Warped egg in Vader’s hand.

As I was writing up this section of my post to get the correct sequence for transforming an image layer I noticed that I should’ve warped the egg in Darth Vader’s hand too. It looks so much better for dripping if it’s draped.

Feel free to Riff and hack into any of my GIFs. It’s fun to see the creativity of DS106 in action with stuff I’ve posted.

I made a point of including all of the GIF files so you could use them if you wanted and a few other pieces of art used in this post.  [Talky Tina  August 2013 GIF Challenge #13: RIFF-a-GIF]

Transparent GIF of Groom’s Joy Ride on the DS106 Space Shuttle

Groom_DS106Shuttle

Groom’s Joy Ride aboard the DS106 Space Shuttle. Right click to download. Open in photo editor as layers to use.

RLP Under Construction

RLP_UnderConstruction

Rockylou Productions Under Construction

August 2013 GIF Challenge #6:  Sophisticate Your Own, Personal “Under Construction” GIF

or

 DS106 AnimatedGIFAssignments911

RLP_Logo_27leavesThe Rockylou Productions logo was created by my daughter, Amber Lockridge, as a surprise gift for me back in October of 2012. It was fun to animate our webheader to create this Under Construction GIF.  It was a simple cut, copy and pasting of the letters and parts into different layers using the full version of Photoshop. Once the layers were in place, selecting the appropriate layers and timing to be visible during the animation sequence.  Nothing to this one.

The tough part of this GIF challenge is going to be figuring out how to customize my Error 404 page.  After reading a helpful post from WordPress.org, it looks like my theme doesn’t have a 404 Template page.  I think this part of the challenge will have to wait until the DS106 Headless Course  boot camp begins on August 26th, 2013.

In the meantime you can check out another error page I had to create for visitors trying to find this blog from my regular Rockylou Productions site.


Rockin’ The Rocks in 3D

RaisinJiggleBand_Stonehenge

California Raisins Rockin’ the Rocks at Stonehenge- 3D Stereo Wigglegram GIF

Another kind of GIF that you can make is a Stereo Wigglegram GIF. You take two pictures that are almost the same except they are taken from two slightly different angles. When they are viewed your brain puts them together into one picture that has a 3D effect. Talky Tina’s DS106  August 2013 GIF Challenge #11: Get Your Wiggle on, with Friends! had us creating one of these 3D Jiggle GIFS.

RaisinIPAD_Band_2

Rockin’ The Rocks in 3D

This is one of those projects I’m not going to admit how much time I actually spent on it.  Let’s just say I was fascinated with the process and technical issues learning how to make these and I was really into it. The idea of having the California Raisins rocking with the rocks at Stonehenge tickled me tremendously. I’ve had a set of these little guys since the late 80’s, and now they sit proudly on a shelf in Studio B. (My basement where I do most of my DS106 and other digital storytelling projects.) Now that I’ve dusted them off, I’m thinking they might be making another appearance in a future stop motion video.

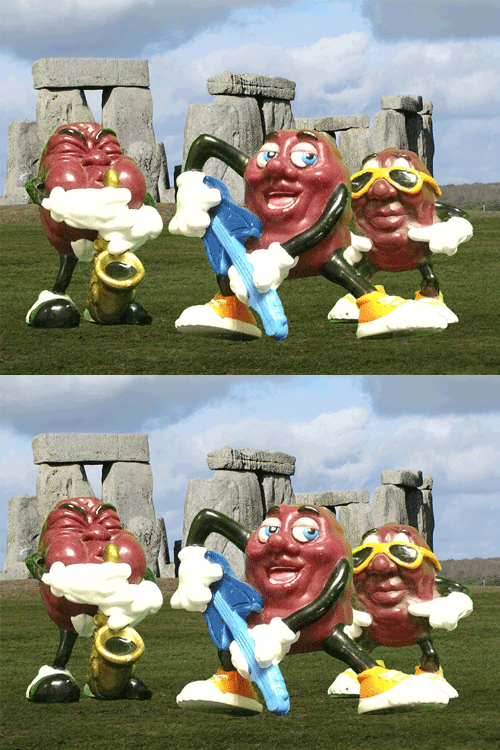
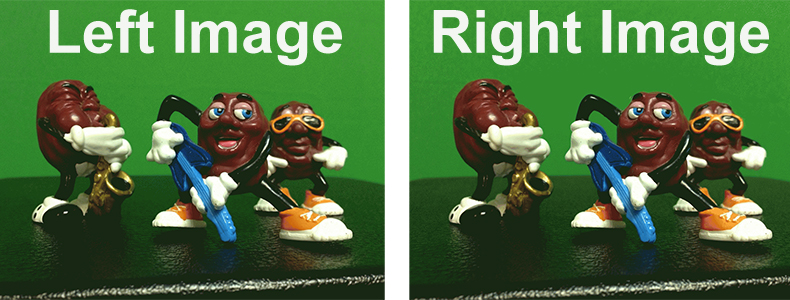
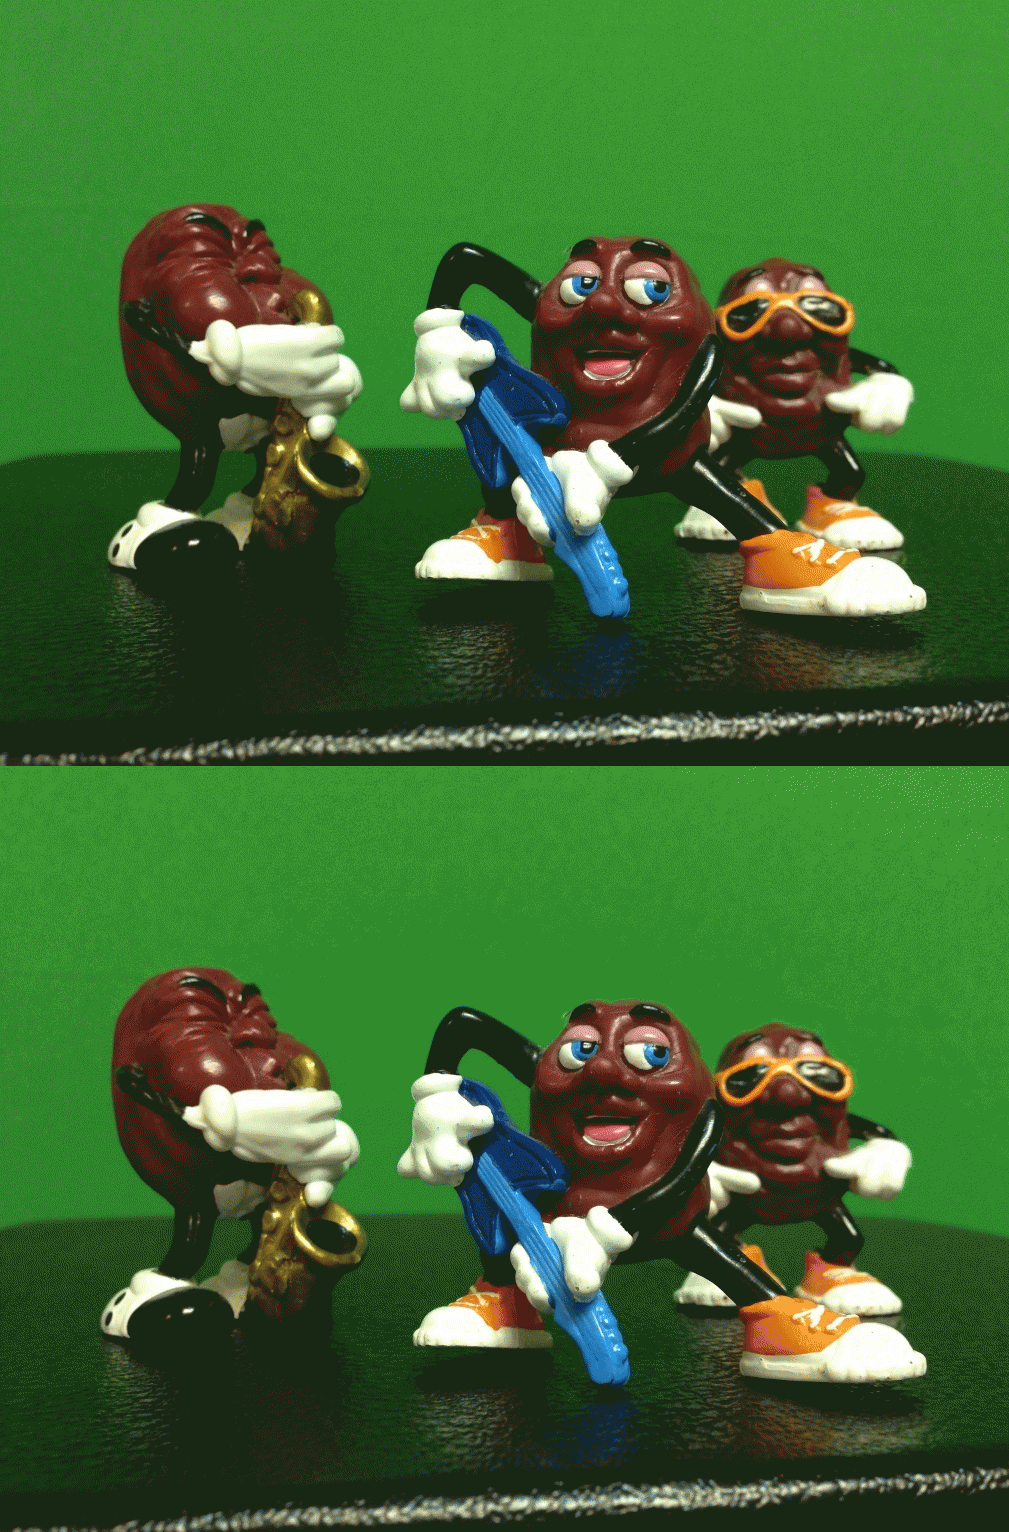
I created a couple of different versions and used different techniques and software as I was moving through the project. I started out with the Camera+ App on my iPhone 5 and downloading the pictures into Adobe Photoshop to create the GIF. I didn’t know how or how much I was to move the camera for the two shots to get a “slightly different angle”, so my first attempts didn’t quite look right. I then read Talky Tina’s post a little closer and she recommended an app called 3D Camera by Juicy Bits. The iPad version of the app gave me some guidance on how to actually take the photos.  You don’t just move the camera slightly by rotating your camera on the tripod like I did, You need to slide the camera in a straight line from left to right to get the two shots.

Raisin_StereoImages

To create good 3D stereo images SLIDE your camera left to right, don’t rotate it.

RaisinIPAD_Band

Green Screen Stereo Wigglegram GIF. Created with 3D Camera by Juicy Bits

My decision to take the original stereo photos against a green background so that I could “easily” replace it with a background of my choosing from my own photo collection didn’t turn out as I had expected. I had ambitiously started out with the concept of having the band members and Stonehenge remain stationary, while only the guitar player popped out of the image. This was NOT successful! (See problem plagued GIF below and second successful version at the end of the post.)  Creating layer masks by using the quick selection tool required a lot of fine tuning to remove the haloed green around my raisins.  This was further complicated by the fact that I was doing this process on two different photos and couldn’t select exactly the same areas with each image.  Consequently, I had occasional bulges and valleys along the edges that had to be manually erased or rebuilt for each separate image so that your eye remained focused on the 3D effect and not the little anomalies as the photos switched back and forth. Here’s an original unsuccessful version for your amusement that is a fine illustration of these issues: green halos, bumps & valleys, instead of popping out of the screen it moves back and forth.

RaisinJiggle_GIF_Band

Unsuccessful first attempt at 3D Stereo Wigglegram. Lots of technical issues!

Ahhh… this is better… a second SUCCESSFUL version of the California Raisin solo guitar rockin’ at Stonehenge.

RaisinGuitar_2_Jiggle

Stonehenge Solo 3D Stereo Wigglegram GIF