Tag Archives: DesignAssignments

got ds106?

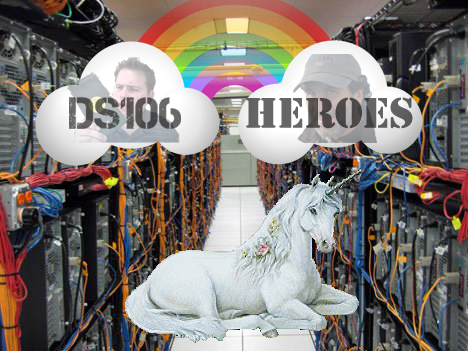
Oh boy… did I have fun with the DS106 Daily Create tdc671. We were to make a poster for a new DS106 ad campaign, ‘got ds106?’, based on the ‘got milk?’ milk industry campaign started back in 1993. [Wikipedia article].  I created the DS106 DesignAssignment1234 to share the fun with future DS106ers. 

got-ds106-superman

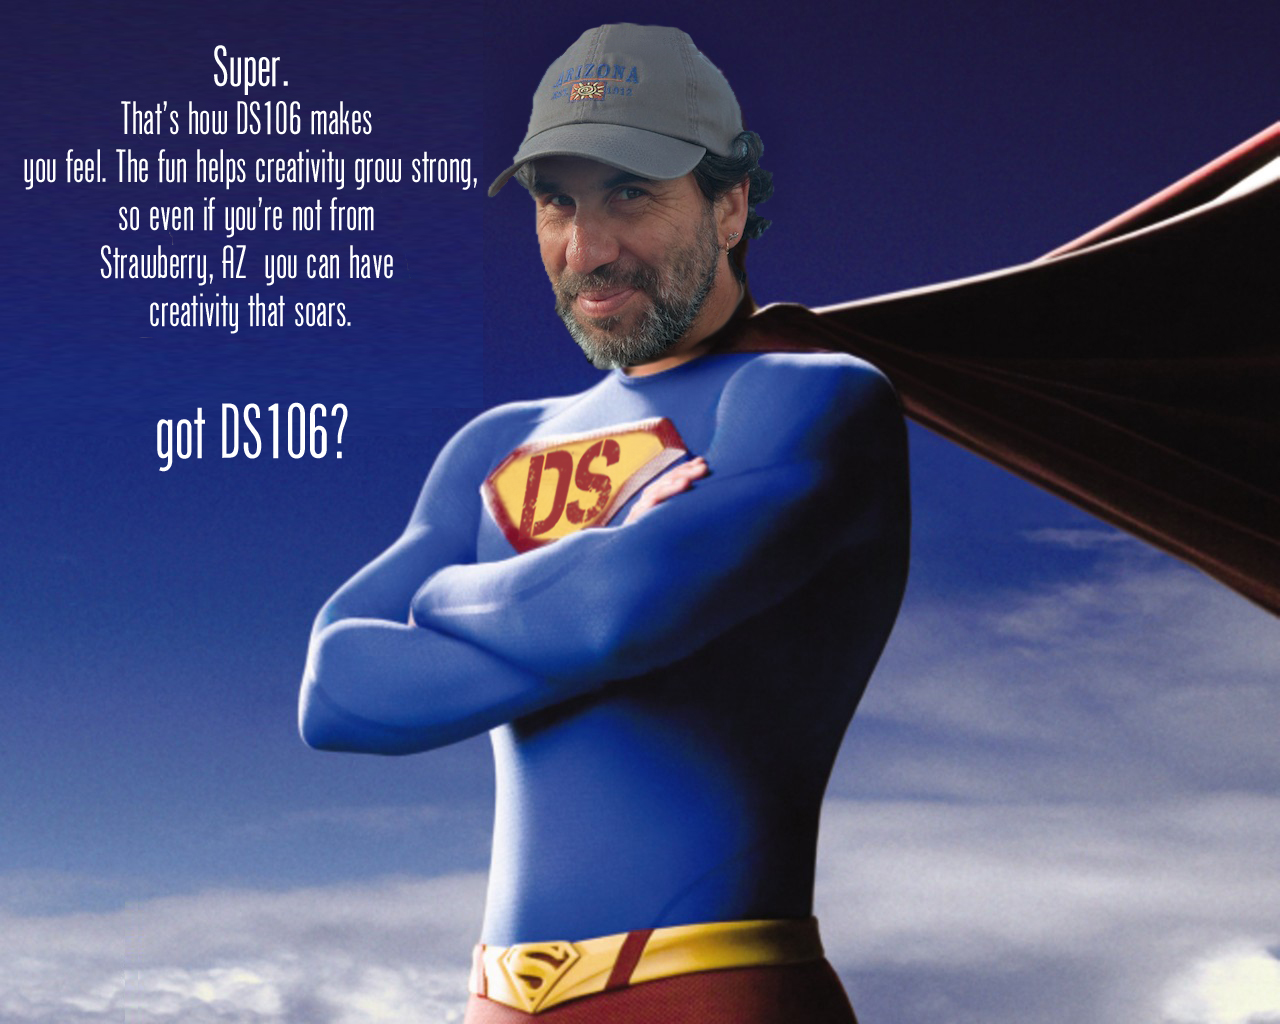
Super Hero Alan Levine assuring us DS106 helps build creativity that soars.

got-milk-superman
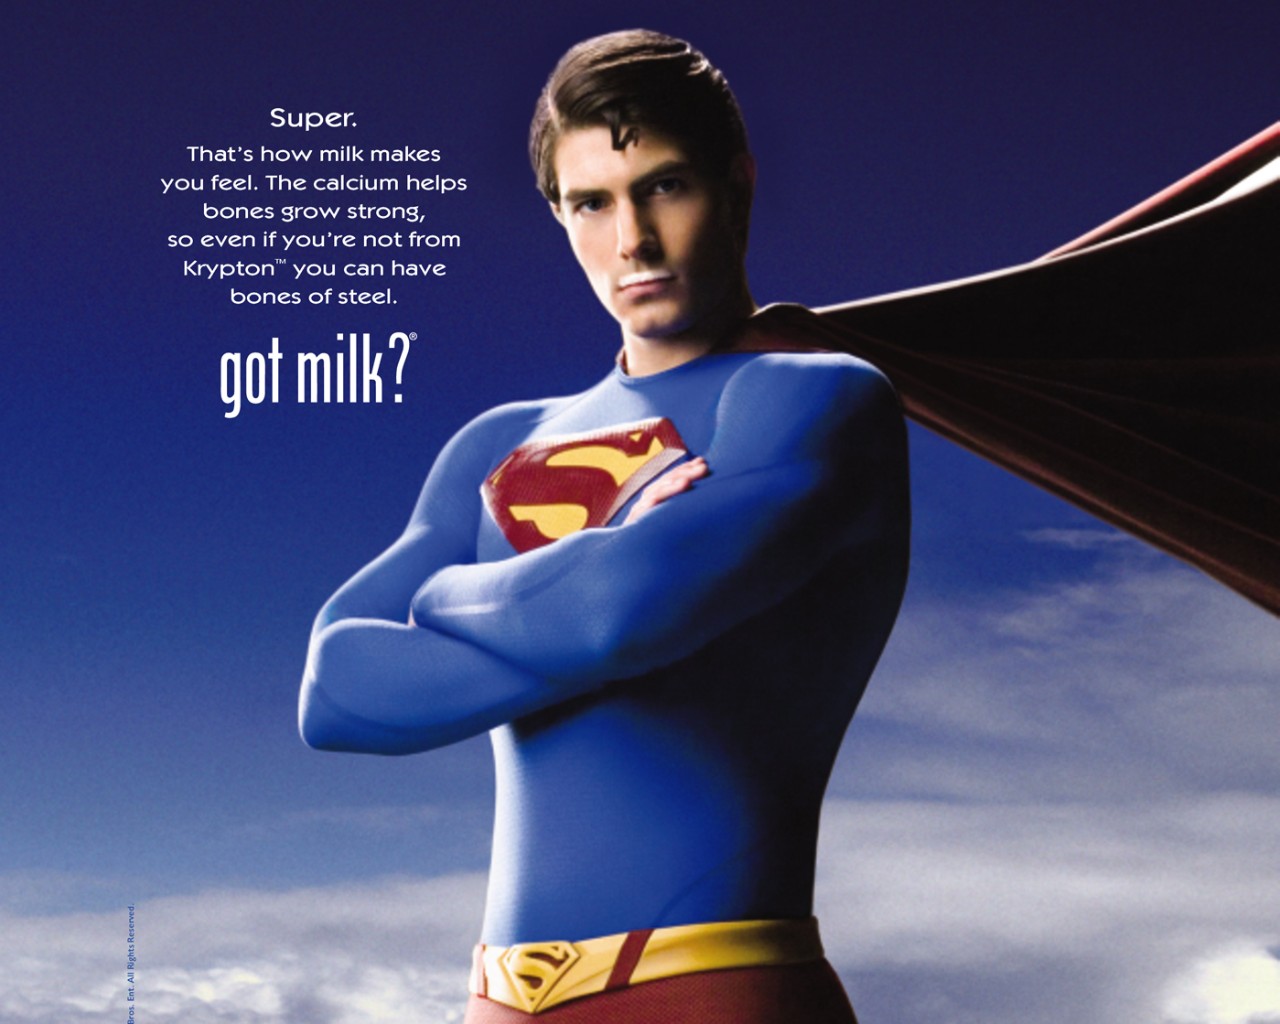
I did a quick search of Google Images for ‘got milk?’ posters and had a plethora of great images pop up.  I was immediately drawn to the Superman poster.  Employing the Google once again I located the Phoenix American font used for the original campaign.  The link will take you to a free downloadable non-licensed version.

I deleted the original text, then copied a section of the remaining blue sky to paste and stretch to fill the empty space.  Using the newly downloaded Phoenix American font I changed a few words to customize it for our ‘got ds106?’ campaign.

Super.
That’s how milk DS106 makes you feel.
The calcium fun helps bones creativity grow strong,
so even if you’re not from Krypton  Strawberry, AZ
you can have bones of steel creativity that soars.
got milk DS106?

 I could’ve just replaced the text , but what would be the fun and challenge in that?
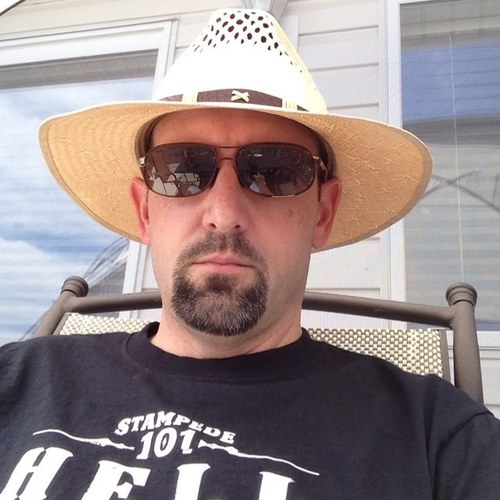
alan-levine

Alan Levine

Photoshopping Alan (a ds106 instructor at Cogdog Blog) Levine’s head onto Superman’s body was a must, and turned out to be much simpler than I thought it would be. (These techniques are “simple” now, but it’s taken lots of practice and perseverance to learn them.) Choosing a good picture with the right composition was important.  I wanted him to be facing to the left and tilted similarly to Superman’s.  It didn’t take me but a few minutes to find a nice photo with another Google Image search, this time for Alan Levine.  Amazingly, the lighting was even a close match.  How lucky was that?

Using the quick selection tool in Adobe Photoshop Elements 12 for the Mac, I selected and deleted everything but Alan’s head, neck and hat. (I thought the hat added another layer of giggle-able absurdity to the mashed image.) Another bit of serendipity was that Alan’s brown jacket blended well with Superman’s cape. Yippeee!  But I needed to do a little rebuilding of the top of his hat since it was cropped in the photo.  This required copying a piece of it from the top, duplicating it a couple of times, reducing the size to align these little ridges on his hat, and then erasing the outside edges of each layer to produce a rounded head effect. I merged all of the layers and used the clone tool to blend them.  His neck was a little trickier. I started with the Spot Healing Brush, then found two new tools today, Smudge and Blur. I was quite pleased with the results. As a finishing touch I used the blur tool again around the edges of his hat and face to give a more blended effect against the sky.

The DS chest plate was pretty simple too.  I used the clone tool to erase the “S”, and produce a blank yellow background in the process. Then cut out a “DS” from the DS106 logo. By adjusting the hue and saturation of the DS layer I was able to approximate the red color of the original “S”.  Resizing and transforming the layer with the skew and distortion effects was employed. And the final adjustment was to reduce the opacity just a tad.

After I uploaded the new poster to flickr I noticed that Superman’s belt also has an “S” on it.  Ooops….. Oh well… it’s not about being perfect here in DS106.  It’s about the creating, trying, learning, and giving it your best…. wherever you’re at.

UPDATE November 24, 2013

Superhero Alan Levine has been GIFfed!

GotDS106_Animate

DS106 Superhero Alan Levine has creativity that soars!

From Academia to Industry, from Bench to Plant. [3M-DS106 Repost]


Originally posted Oct 4, 2013 on an internal 3M blog by “HC” a 3M-DS106 Salon member

From Academia to Industry, from Bench to the Plant. (3M-DS106 Repost)

HCHeadlessGIF

“HC” 3M-DS106 Salon Member

This week one of my friends from Australia finally landed an industry position in the US after many years.  He did his masters degree where I was doing my postdoctoral research and that was when our path first crossed.  He later moved interstate to another university to do his doctorate (when I started working at 3M).  He finished his research and then went to Virginia Commonwealth University for his postdoctoral research.  As his project is winding down, he asked if 3M was hiring any inhalation scientists and at that time, we unfortunately weren’t.  Found out this week that he got into PPD (Pharmaceutical Product Development) in Middleton, Wisconsin and one of his first comments was that “Industry is so different from Academia!”

I agree with that statement, and now that I have about the same experience in industry (5 years at 3M vs 4 years as a research only academic) I see some similarities and a lot of differences.  Some people prefer the deep understanding that being in academia can get you while some prefer taking that knowledge and commercialise into products.  Academics live off grants (unless they get tenure, but even then, grants are still good), while in industry we use internal grants to fund research/development on projects that interest us and could lead to success for the business and company.  There are plenty of articles comparing the two ‘worlds’ and I probably won’t add too much wisdom to that body of work.

Having said that, one thing that my academia friends might not get to see is the manufacturing plants (or even those friends in Silicone Valley).  It is a complex facility that also require ‘magic’ to get products out.  This is where 3M also excels in, taking development from the bench and scaling it up in manufacturing.  Currently I am working through scale-up of one of the products that I am the project lead on and looking at the manufacturing path on how we can make the products.  We typically draw a schematic of the process flow but what if we can animate it to understand the flow better?

One of the DS106 assignments had a topic that is “Spreadsheet Invasion“, where you use a spreadsheet (in this case, Microsoft Excel) to do your animation on.  I decided to do a rough schematic that is kind of realistic (probably 80 % close) but not exactly the process I am using..

Spreadsheet Invasion - Example Manufacturing Scheme

This shows how complex the manufacturing process can be, with multiple inputs at different site locations.  It is also something we like to show how much work our Product Engineers do such that the end user does not notice any change in performance of the final product – that particular information has been animated using PowerPoint in a presentation and will not be shown here as it does show real actual manufacturing processes and the number of input materials as well as test standards to maintain.

Do most people know how complex manufacturing can be when they were still studying?

—-

Animated GIF notes:

  1. Planned the images to draw and the sequence
  2. Coloured the cells for the frame, do a screen capture of everything.
  3. Paste As New Layer in GIMP
  4. Save as GIF, as an animation.

Technology is Great! (When it works.)

Servers_Unicorn_Rainbow

Tim Owens (@timmmmyboy) and Alan Levine (@cogdog) – DS106.us heroes

Servers_Unicorn_Rainbow

Keeping the DS106 server happy.

Technology is great… when it works. And keeping the DS106.us site up and running has been a labor of love and a real pain at times – especially this week.  So Talky Tina’s August 2013 Animated GIF Challenge #9 was to make an animated GIF celebrating the behind the scenes work that keeps the ds106.us server happy. Giving some love and recognition to the folks behind the scenes that keep the web servers and internet tubes running. Tim Owens and Alan Levine were on the battlefield this week.

D'Arcy Norman - Hero Too

D’Arcy Norman – DS106 Hero

UPDATE: Just found out from Alan (see comment below) that Tim and D’Arcy Norman (Twitter @dlnorman) are doing all the heavy lifting to get and keep the DS106 servers up and running. This thank you GIF is for D’Arcy too.

This was also an assignment before there was an Animated GIF category — found hiding in the Design Assignments category as @cogdog‘s wonderful Design Assignment 842: Rainbows and Unicorns in the Server Room. Make an animated GIF of a server room that includes both rainbows, unicorns, and a message of thanks. The cheesier the better. Bonus points for elves and pink ponies.

WOW! What a difference.  Making the GIF this time around I discovered the wonders of the full version of Photoshop CS5. No more manually merging the layers before I can take a test drive, and I can easily change the animation screen time for each image seperately.  In Photoshop Elements you don’t have that flexibility. I’ve had to use the brute force method of saving several versions of files with the individual layers, different merged images, etc. so I could go back to them when I wanted to make a change. A few of my past blog posts walk you through this time consuming painful experience.

Yes. Technology is great…. when it works.  And I can tell you, the full version of Photoshop works! No wonder some of the DS106ers can crank these animated GIFs out in no time.

Images:

A few other server images you might enjoy

Up, Up, And Away


Animated Movie Poster GIF

Meet Rochelle from Pixar’s movie “Planes”.

Still enamored with creating GIFs, I stayed up way too late last night creating this animated movie poster from the movie Planes by Pixar to be released in theaters August, 2013. (DesignAssignments313)

Let me give you a little background on why I chose this particular movie poster. My name is Rochelle, and it’s not a very common name in the United States.  I met only one other Rochelle growing up, and that was in High School.  I’ve met maybe 5 others my whole life. So when a Facebook friend posted on my timeline that Pixar would be introducing a new character in their upcoming movie about planes, I was beaming,

 “I have a cartoon character named after me?”  

Now this assignment would give me the opportunity to create something out of a real movie poster that had my name on it.  How cool is that? If I liked it, I could see using it in other circumstances around the web. I do like my final product, so you might see it popping up again.

Keeping with this week’s design theme, I studied the poster to understand what is being conveyed in the image.  Since the movie isn’t even out yet, I read the Pixar synopsis of the movie and more specifically the plane character, Rochelle. (voice of by Julia Louis-Dreyfus)

Excerpt from Pixar site:

Rochelle

Pla rochelle rolloutimage v3-0simp

(voice of Julia Louis-Dreyfus)

Rochelle is a tough racer and the pride of the Great White North. Always confident and capable, she got her start running mail to small towns in Quebec, picking up home remedies for mechanical maladies along the way. She also developed a knack for fast travel that ultimately inspired her to give air racing a try. Rochelle never looked back (this competitive contender doesn’t need to). She is relentlessly pursued by charmer El Chupacabra, but steadfast Rochelle is much too focused on winning the race to return his affections.[20]

I would also need to keep in mind the file size limitations of a GIF, how many frames I’d be allowed in my photo editing software, and since I didn’t want this project to consume my life for days, the number of frames I’d actually have to create.  I decided that the important elements of the poster to focus on would be that this is a plane, and then illustrate something about Rochelle’s personality.  My first overly ambitious thoughts were to have her fly on the poster.  Moderating my initial exuberance with a dose of reality, I admitted to myself the work required to make the plane actually fly in or out of the poster was way too complicated to pull off.  My rational, although still very creative self, went with animating the propeller props, and giving her a wink.  I’m not totally at peace with the symbolism of her winking, since the character synopsis says she is steadfast and much to focused on winning the race to return another plane’s affection, but I’ve seen the blinking effect used in a lot of other GIF projects (Ben’s “The Colorized Zone” was a big inspiration), so why not give it a try.

[An illustrated detailed process of creating this animation will be documented and posted as a tutorial eventually. Until then, you can view a tutorial example with only one animation zone.] 

A summary of the process using PhotoShop Elements 11 for the Mac:

1. I used the lasso tool to grab an image of each of the propellers and the eyes/windshield of the plane. This was pretty painstaking while I experimented with which parts of the propeller would work best to create the rotating effect.  I then duplicated the propeller images and rotated them 30deg and 60 deg. I ended up with 3 different propeller images for each side of the plane.

2. For the winking eye I used the lasso tool again to capture just the left half the windshield image.  Then started stretching, erasing, copying, pasting, aligning… until I had something that looked right.

3. Once all of the individual image layers were created, it was time to merge the appropriate layers to create new combined images that would animate correctly.  Oh my was this a chore as it became closer and closer to midnight.  I was creating a total of 3 animation zones?! My brain just wasn’t working as well anymore and I was having a hard time following tracking of what went where.  And remember that ambitious enthusiasm I spoke about? Well I added in an additional challenge to have each of the propellers appear to be spinning a little differently. And believe you me, it was no walk in the park to properly align everything so that those parts that were supposed to be still remained still.  I didn’t want any distracting jumping around of the animation.

4. The timing of the animation sequence was also important.  I didn’t want her constantly winking, yet I wanted the propellers to be moving at a quick rate to provide a better spinning illusion. I was able to create the effect I wanted by duplicating more of the image layers for the propellers and sandwich the winking effect in the middle. All-in-all I ended up with a total of 14 frames: 8 propeller frames + 2 winking frames + 4 propeller frames, all running at 0.2 seconds per frame.

As I mentioned above, this post only gives a high level synopsis of creating this GIF.  The tutorial will have much more detail with screen shot images and examples at each stage as I move through the creation process.