Thanks to a recent post by John Johnston “Flicking a Five Card Story” I brushed aside my anxiety, took the leap and dived into the HTML. Well, let’s be real… I just dipped my toes in the shallow end… but I did it. I created borders around all of my images in my 5 Card Flickr Story post, 5 Card Poetry – Sharing My Story YAY!!!!!!!
I’d been wanting to do this since my first WordPress based blog post. It was very easy to do when I was programming my websites using RapidWeaver. I just clicked on a picture formatting box, chose my style, and it was all done for me. That hasn’t been the case with this blog. Maybe I just haven’t located the right WordPress widgets and plug-ins yet. But I agree with John (and Alan Levine) that it is good to know how to work directly with the code. What was it Alan said? “Code or Be Coded”. Let me show you what I did. And then you can give it a try too.
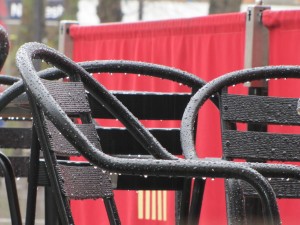
I wanted to take this image I had taken in February 2010 outside a small cafe in Salisbury England, and give it a border and a shadow to produce a more finished 3D look.
By opening the text editor tab, I located the code that inserts this image into my post.
<a href=”http://rockylouproductions.com/blog_wp/wp-content/uploads/2013/09/EnglandRainChair.jpg”><img class=”size-medium wp-image-2841 alignnone” alt=”EnglandRainChair” src=”http://rockylouproductions.com/blog_wp/wp-content/uploads/2013/09/EnglandRainChair-300×225.jpg” width=”300″ height=”225″ /></a>
What I needed to do was to add an extra bit of HTML code to add some STYLE to the image. I found a quick tutorial on-line on how to create borders around stuff at: http://wpbtips.wordpress.com/2009/10/14/borders-pt-1/
For a border around an image, you insert a style definition between the img and the src tags of the image code: <img style=”border:1px TYPE #HEX;” src=[etc. etc.]
- TYPE refers to the border type (solid, double, dashed, dotted, outset, inset, groove, ridge). You can see examples here.
- #HEX is your color. I used this easy Hex Color Picker site to grab the code.
Then I opened John’s post so that I could view his source coding. He did things a bit differently by doing something with the CSS code I think, but I haven’t touched that yet. I could still locate where he added the HTML code to create a shadow though.
#fivecards{height:320px;width:500px;} #fivecards p{text-align:center;; } #fivecards img{max-width:500px;max-height:300px;border:solid 1px;padding:10px;box-shadow: 5px 5px 2px #888888;margin:5px} #fivecards a{color:#000}
The final additional code I needed to insert within the text editing view was:
style=”border: 8px ridge #FC0356; box-shadow: 5px 5px 2px #888888;”
This told my blog post to format the picture with…
- an 8px border around the image
- formatted as a ridge
- with a red color variation identified as #FC0356
- Add a box-shadow (Link to explanation of box shadow properties.)
- with offset dimensions 5px horizontal shadow, 5 px vertical shadow, and a 2px blur spread
- with a greyish color identified as #888888
NOTE: It’s very important you get all of the quotation marks, commas, and semi-colons exactly right.
The final HTML code looks like this:
<img class=”alignnone size-medium wp-image-2841″ style=”border: 8px ridge #FC0356; box-shadow: 5px 5px 2px #888888;” alt=”EnglandRainChair” src=”http://rockylouproductions.com/blog_wp/wp-content/uploads/2013/09/EnglandRainChair-300×225.jpg” width=”300″ height=”225″ />
Giving me this beautifully red bordered and shadowed image.

or alternately by changing the Hex color number to #6E6E6E I can produce a dark grey border.

If you are really ambitious and want to learn how to program with HTML and CSS I found this site http://www.w3schools.com/ helpful a few years back when I was just starting out. Once I started “programming” with RapidWeaver I didn’t feel I had a need for it until now.

Thx again @johnjohnston for creating photo borders. I programmed HTML for #ds106 5-card Flickr story & posted process http://t.co/MxmXFhHIHJ
[…] Learned how to edit the HTML of a post to create borders that John Johnston shared. You can read how to do it yourself as I’m “Tiptoeing Thru HTML To Make Borders” […]
[…] Finally, I used the WordPress Slideshow plugin to add them to my blog post. Then by editing the HTML code in the text view the borders and shadow effect of the final two images were created. Learn how here. […]
At this moment I am ready to do my breakfast, when having my breakfast coming over again to read other news.